Audio and Video Anatomy
Take a look at the new and improved interface of the Audio & Video window, and let sound and vision be at the center of your webinar!
Here’s a quick rundown of how things work:

Turn Camera on/off
This button activates and deactivates the camera. When pressed for the first time, it also automatically activates the audio.

Mute/unmute
With this button you can turn your microphone on and off.

Stop Audio & Video
By pressing this button, you turn off both the audio and video transmission and the stream from your camera will no longer be visible in the Audio & Video window.
Create Your Perfect Audio and Video Setup
At LiveWebinar, one of our priorities is creating a platform that can adjust to the needs of its users. For that reason, you have plenty of options to choose between, from different camera layouts to hiding the whole Audio & Video window, LiveWebinar lets you set up your webinar room the way you want.
Expand Your Audio and Video
If you’re in a webinar mode and find the Audio & Video window, too small, you can extend it into the content window. By doing so, you ensure that all the camera streams of your attendees will be visible in the content space.
At the same time, you won’t lose quick access to other elements of the room, i.e., the Chat and Participants List.
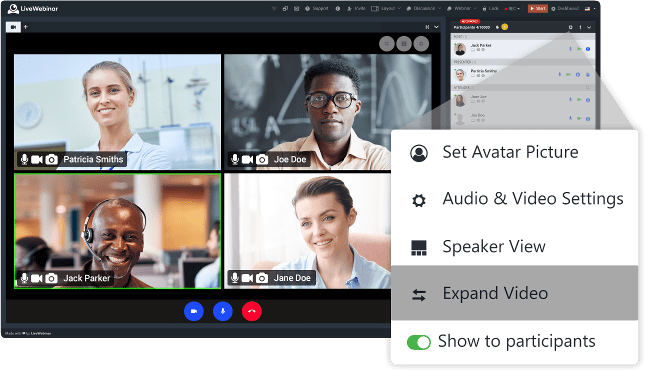
Enhanced Camera Layouts
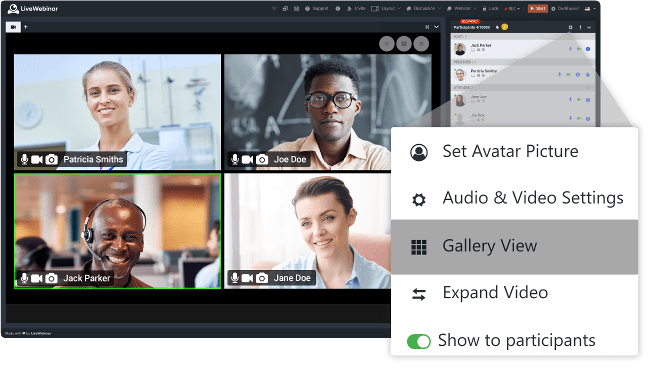
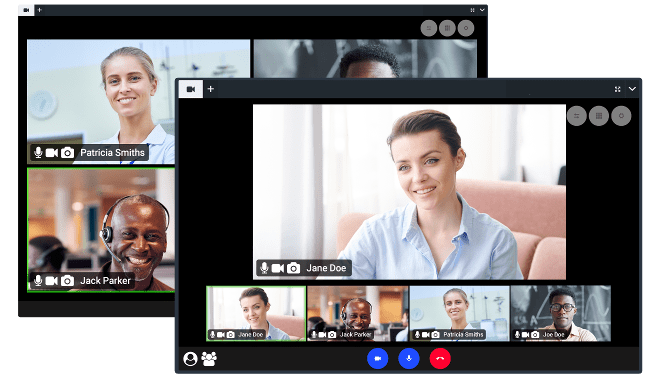
Gallery View
See all your participants at once with gallery view. When this layout is activated, all the camera streams in the Audio & Video window will be of the same size and will automatically adjust to the size of the browser window.
If someone chooses to only activate their sound, they will appear in the Audio & Video window, but only their nickname and avatar (if they’ve chosen to add one) will be visible.
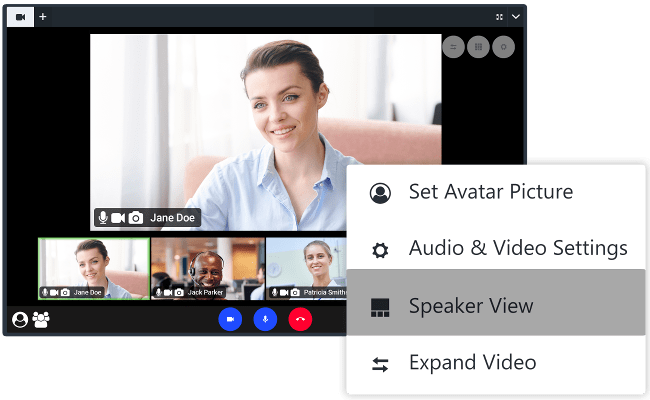
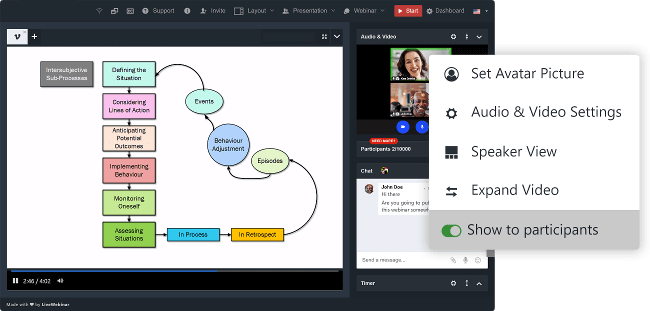
Speaker View
If you select this camera layout, the audio and video window will be divided into two parts: the camera stream of the main speaker will appear in a large window, with the other attendees’ streams in smaller windows below.
The stream of the person speaking will automatically jump to the top of the other camera streams. This view is most useful when the focus needs to be placed on one person.
Switch Between the Views
You can switch between the camera layouts depending on the type of meeting you’re leading. Gallery view can be great if you’re running a discussion or a remote team meeting and want to see all your attendees. Speaker view can be helpful during lectures or meetings when mainly one person is speaking.
Highlight Active Speaker
Have you ever had one of those brainstorming meetings where someone comes up with a great new idea, but you have no clue who? By turning on the "Focus Active Speaker" feature, the video stream of the participant who’s talking will be highlighted with a green frame.
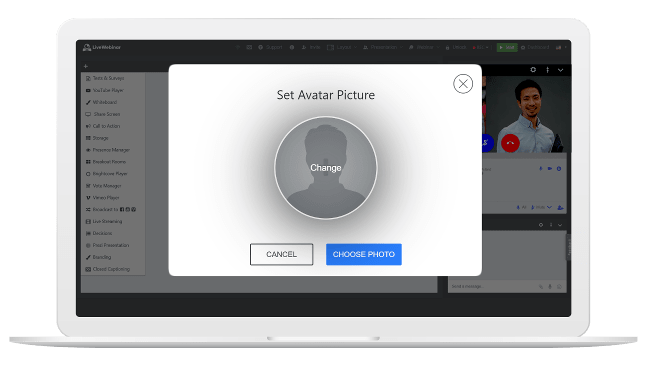
Upload Your Avatar Picture
If you’re feeling shy and don’t want to be seen, you can upload an avatar to let other attendees know who you are. The avatar will appear next to your name in the Participants List. In the case that you choose to only have your audio active, your avatar and your nickname will appear in the Audio & Video window.
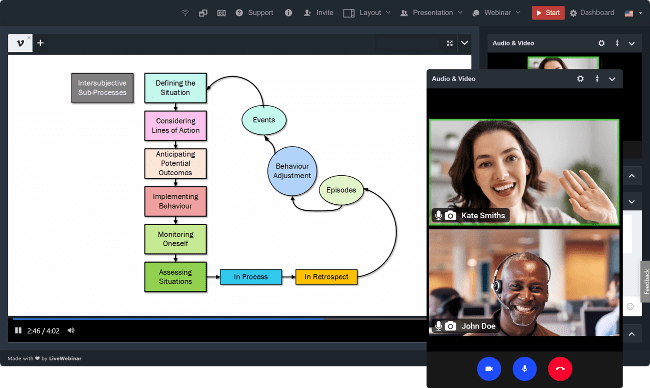
Audio and Video Window – Here’s What You Get
When you or one of your participants turns on their camera and microphone, the stream will appear in the Audio & Video window, along with a set of icons allowing for control over said streams.
Here are some of these features:
See Who’s Who
Each camera stream has a given attendee’s nickname visible. In the case that a user only has audio active, their nickname and avatar (if they’ve added one) will be visible.
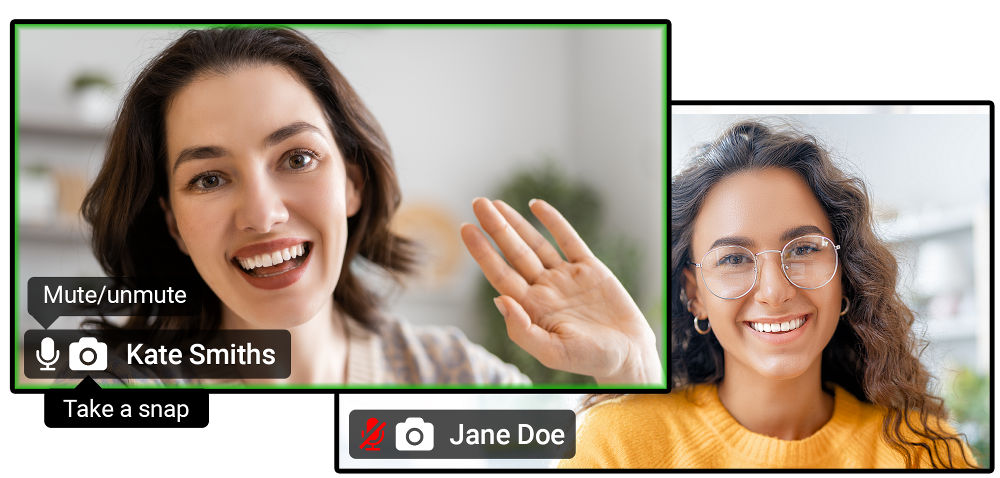
Mute/Unmute
Use this option to mute or unmute a participant.
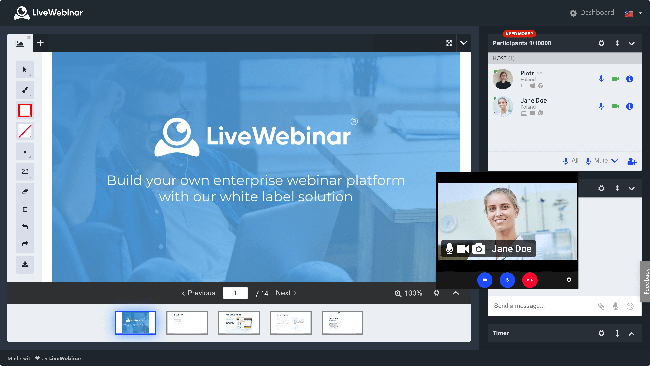
Take a Snap
You can take a snapshot of any given participant’s camera stream by clicking the “Take a Snap” option. It will be saved in your account storage.
Sharing Audio and Video
LiveWebinar was created to provide a set of functionalities which give you complete control over your attendees' audio and video. By using these features, you can allow interaction and discussions, or moderate them when needed.
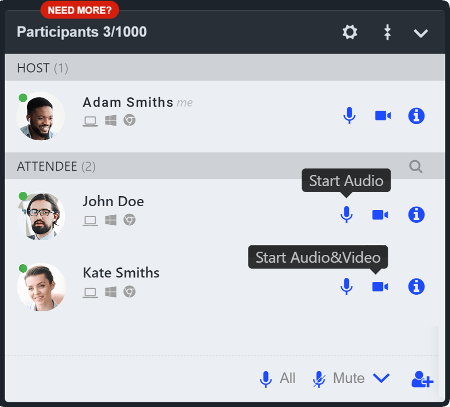
Send Requests to Turn On Audio and Video
Whether you’re in discussion, presentation or Q&A mode, you can request each participant to turn on their audio and video. To do so, use the icons to the right of an attendee’s name in the Participants List.
Got a Question? Raise Your Hand!
When you’re leading a Q&A, your attendees can use the “Raise Hand” function. This feature tells you when someone would like to speak up. At any moment you can revoke speaking privileges for a given attendee.
Control What Participants See
If you temporarily want to prevent attendees from hearing and seeing you, the option of hiding Audio & Video window will be useful. On the other hand, if you’re hosting a presentation and still want participants to see and hear you, picture in picture might be what you need. Use the feature that suits your needs best at any given time.
Show or Hide the Audio and Video Window
If you don’t have the need for your participants to use audio and video, you can completely hide this window from participants. The window will still be visible to hosts and presenters though, making it useful for conducting internal discussions during the webinar.
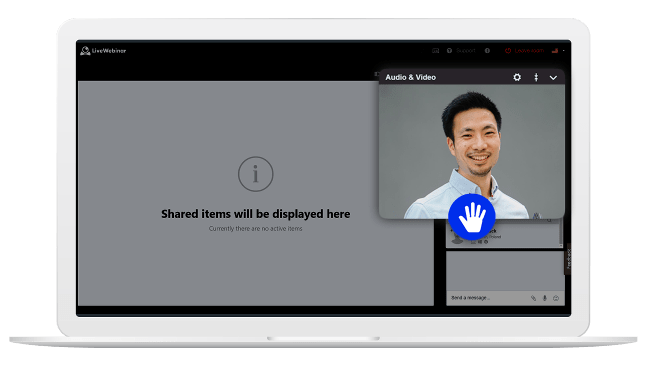
Picture in Picture
Expanding the video into the content area and opening a new tab with a presentation, video or whiteboard will automatically activate the picture in picture feature. Participants will see a small floating window with your video stream where they can position wherever they want on their screen.
Audio and Video Settings
Choose the camera and audio source you want to use during the event.
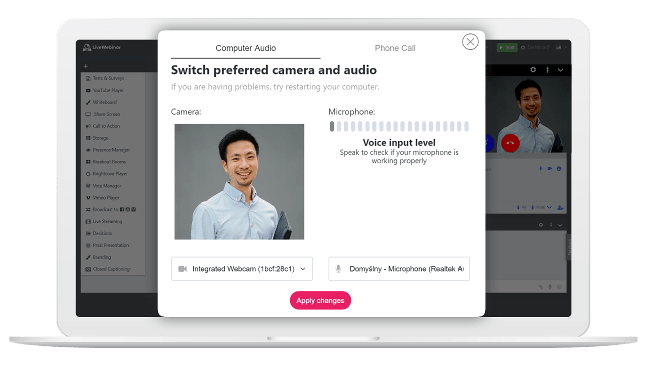
Select Your Camera and Microphone
If you’re using an external camera or microphone, you can select it in the audio and video settings and test it to make sure that all outputs are working well. Make sure that you’re in a well-lit area and that the quality of your video is good.
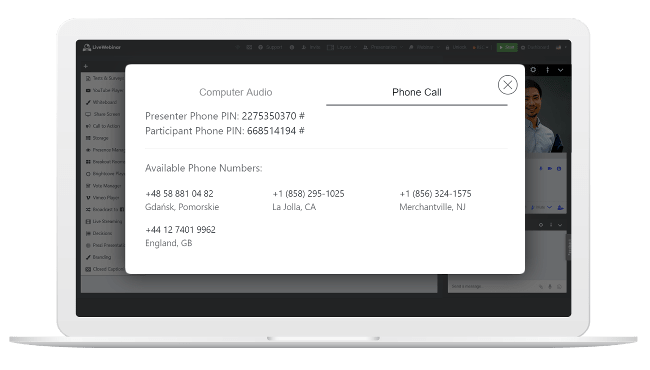
Phone Bridge
Not all of your attendees have good Internet access? No worries! In the second tab of the audio and video settings you’ll find a list of toll-free numbers that your participants can use to call into the webinar. This information is also available in the header, under the (i) icon.
Read more