CATEGORIES
- A free account
- Account assistants
- Account Information
- Affiliate Program
- Appearance
- AppSumo
- Audio & Video
- Branding / Custom / Whitelabel
- Branding Tool
- Break-out Rooms
- Call to Action
- Camera & Microphone
- Capacity & Limits
- Certificates
- Closed captioning
- Decisions - Professional Voting
- E-mail templates
- Event tokens
- Evergreen webinars
- Forms
- How to join meeting on mobiles
- Hubspot Integration
- Integrations
- Language interpretation
- Live Transcription
- Meetings & Webinars
- Other
- Pabbly Connect
- Paid Webinars
- Presence Manager
- Recording
- Registration
- Requirements
- Room Chat
- Screen Sharing
- Session Management
- Statistics & Reports
- Storage
- Streaming
- Sub-Accounts
- Tests & Surveys
- Virtual Backgrounds
- Vote Manager
- Waiting rooms
- Webinar and Meeting Room Features
- Website Presenter
- Whiteboard
- Wordpress plugin
FAQ -> Recording -> How to edit webinar recordings?
How to edit webinar recordings?
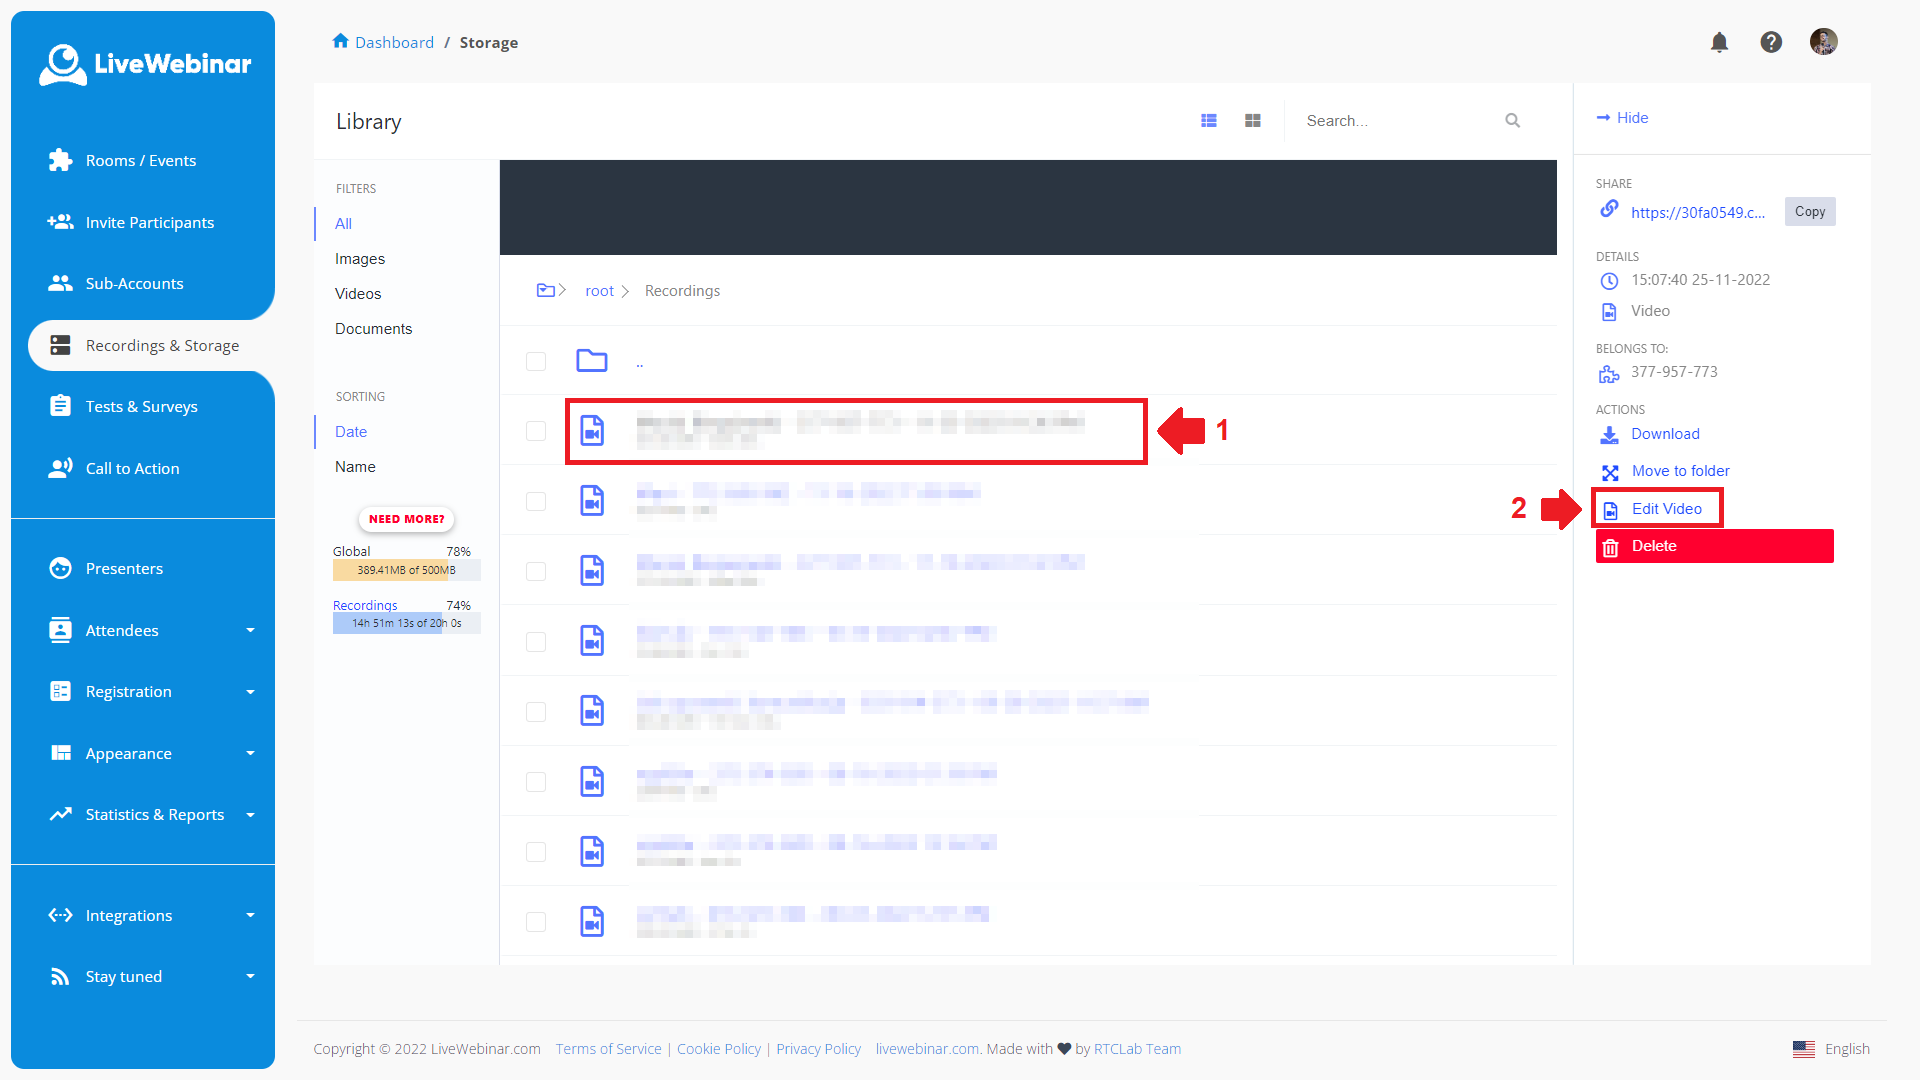
Please find the recording you want to edit in your storage and choose the “Edit Video” option. However, we must note that the recording editor is available only as an Add-On to all of the paid packages.
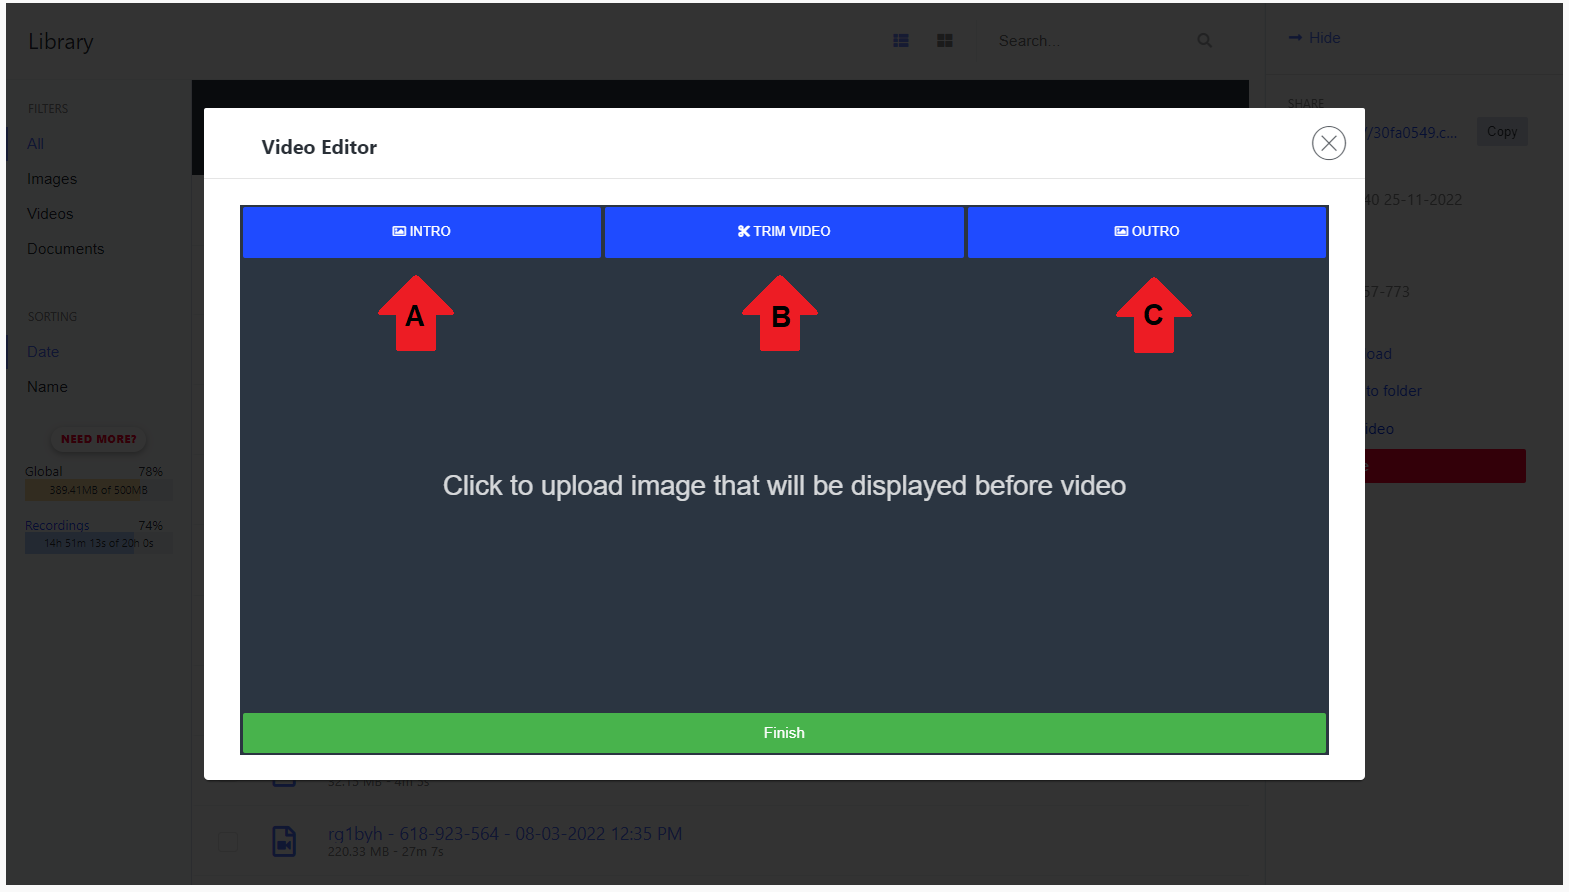
From there, you will be directed to the video editor. Here you have three main options for edition:
a) Intro – add an image that will be displayed before the video.
b) Trim video – in this section you can do your actual editing – crop or add to the recording, add a watermark
c) Outro – add an image that will be displayed after the video
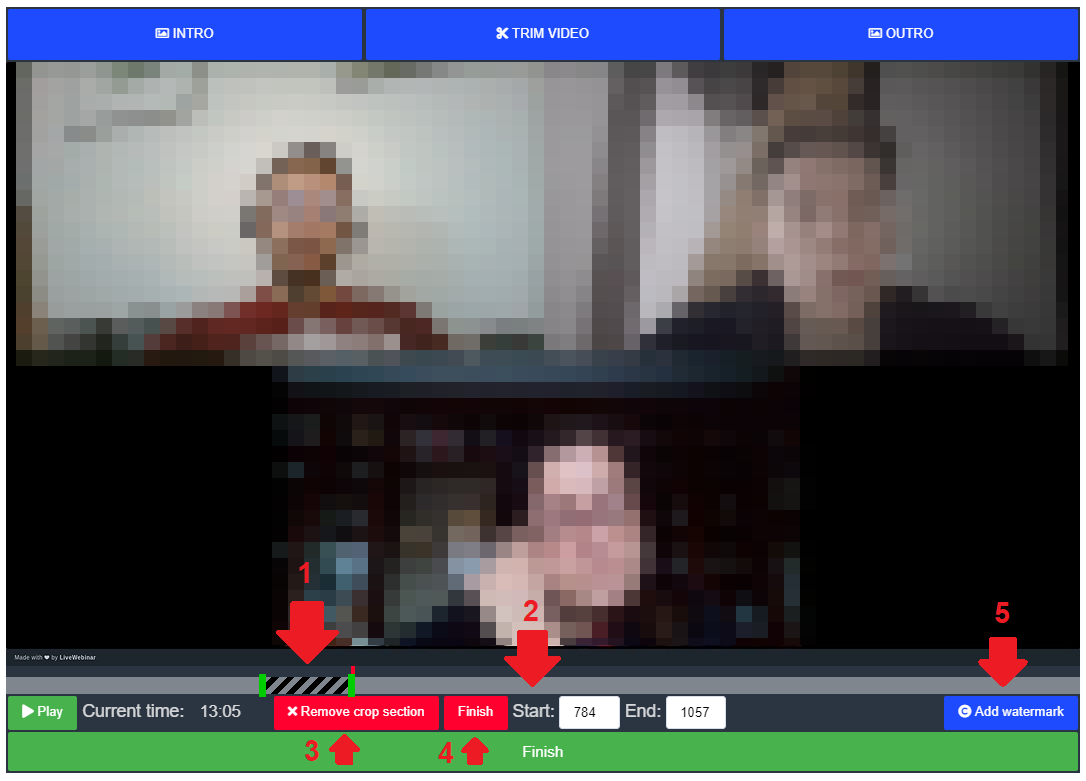
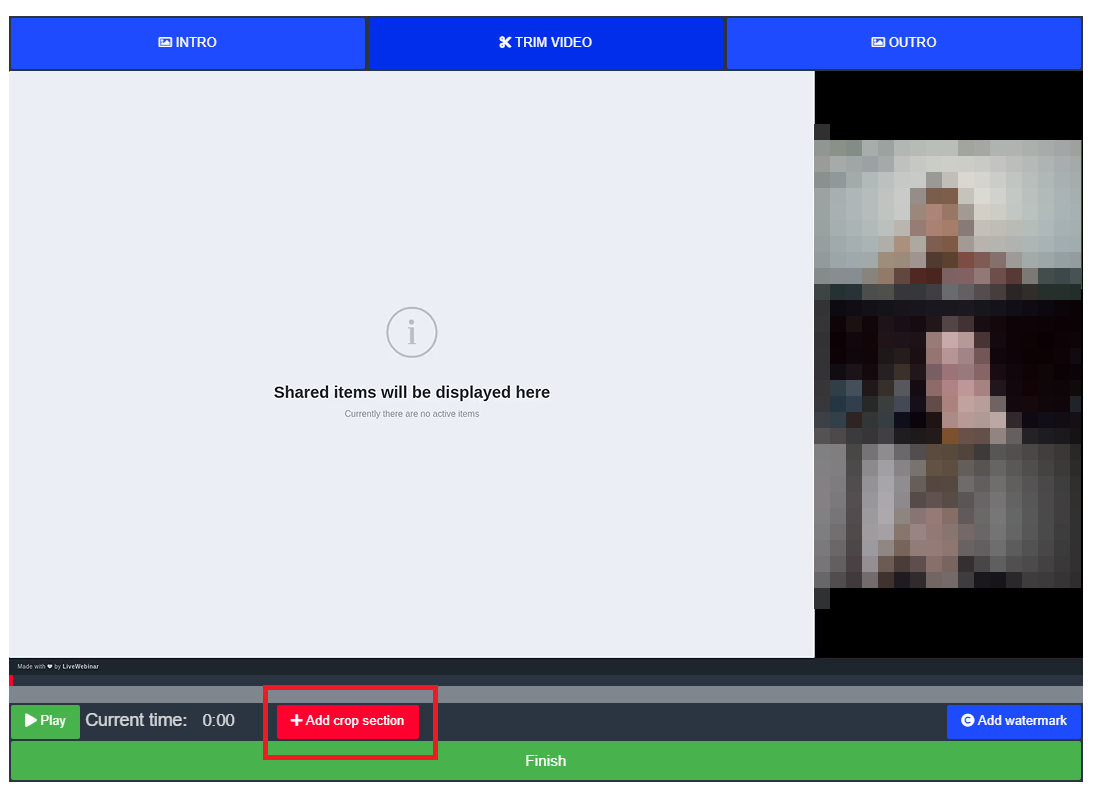
To begin editing and trimming your recording, click on “Trim Video”, and then “Add crop section”.
To crop your video, click on the gray bar above “Add crop section” (1). The point in the bar that you click will be the start point of the crop. Simply click again on the bar to select the section you want to crop. You can also do this by manually typing the start and end times (2). Once you’ve marked the part you want to remove, simply select “Remove crop section” (3). To stop cropping at any time simply click “Finish” (4).
To add a watermark, just select “Add Watermark” (5) and you will be directed to choose an image to upload as a watermark on your webinar.
When you are completely finished with your edit, simply click “Finish”.