CATEGORIES
- A free account
- Account assistants
- Account Information
- Affiliate Program
- Appearance
- AppSumo
- Audio & Video
- Branding / Custom / Whitelabel
- Branding Tool
- Break-out Rooms
- Call to Action
- Camera & Microphone
- Capacity & Limits
- Certificates
- Closed captioning
- Decisions - Professional Voting
- Event tokens
- Evergreen webinars
- Forms
- How to join meeting on mobiles
- Hubspot Integration
- Integrations
- Language interpretation
- Live Transcription
- Meetings & Webinars
- Other
- Pabbly Connect
- Paid Webinars
- Presence Manager
- Recording
- Registration
- Requirements
- Room Chat
- Screen Sharing
- Session Management
- Statistics & Reports
- Storage
- Streaming
- Sub-Accounts
- Tests & Surveys
- Virtual Backgrounds
- Vote Manager
- Waiting rooms
- Webinar and Meeting Room Features
- Website Presenter
- Whiteboard
- Wordpress plugin
FAQ -> Recording -> External storage/FTP
External storage/FTP
What is FTP/S3?
LiveWebinar offers the option to connect your FTP (file transfer protocol) and S3 (Amazon Bucket) storage servers. These are two types of storage servers which allow you to store your LiveWebinar recordings and other data. An Amazon S3 cloud storage or the FTP server may be used for storing webinar recordings. Each time a new webinar event recording is created it will be automatically uploaded to S3 cloud storage or an FTP server of your choice. Note that when editing your recordings with the built-in audio/video editor to make a copy of the original recording since saving any changes while editing will overwrite the original file.
What can connecting my S3/FTP server provide?
This feature can be treated as an additional method to back up your recordings. Alternatively, you can use it to 'expand' your account storage, by transferring recordings from your LiveWebinar account storage to an outside server, and freeing up space in your LiveWebinar recording storage.
What's the difference between storage and recording storage?
Storage and Recording storage are two separate things. Recording storage is only for your LiveWebinar recordings and these are counted separately from your Storage area which is for storing your files and folders you upload.
Recording storage is measured in hours. Regular storage is measured in MB.
You can manually download your recordings to your desktop and there is also a setting option under your account where you can connect your AWS S3 storage or FTP server. When completed, LiveWebinar will automatically upload your recordings to your storage area in the cloud.
How to access the server
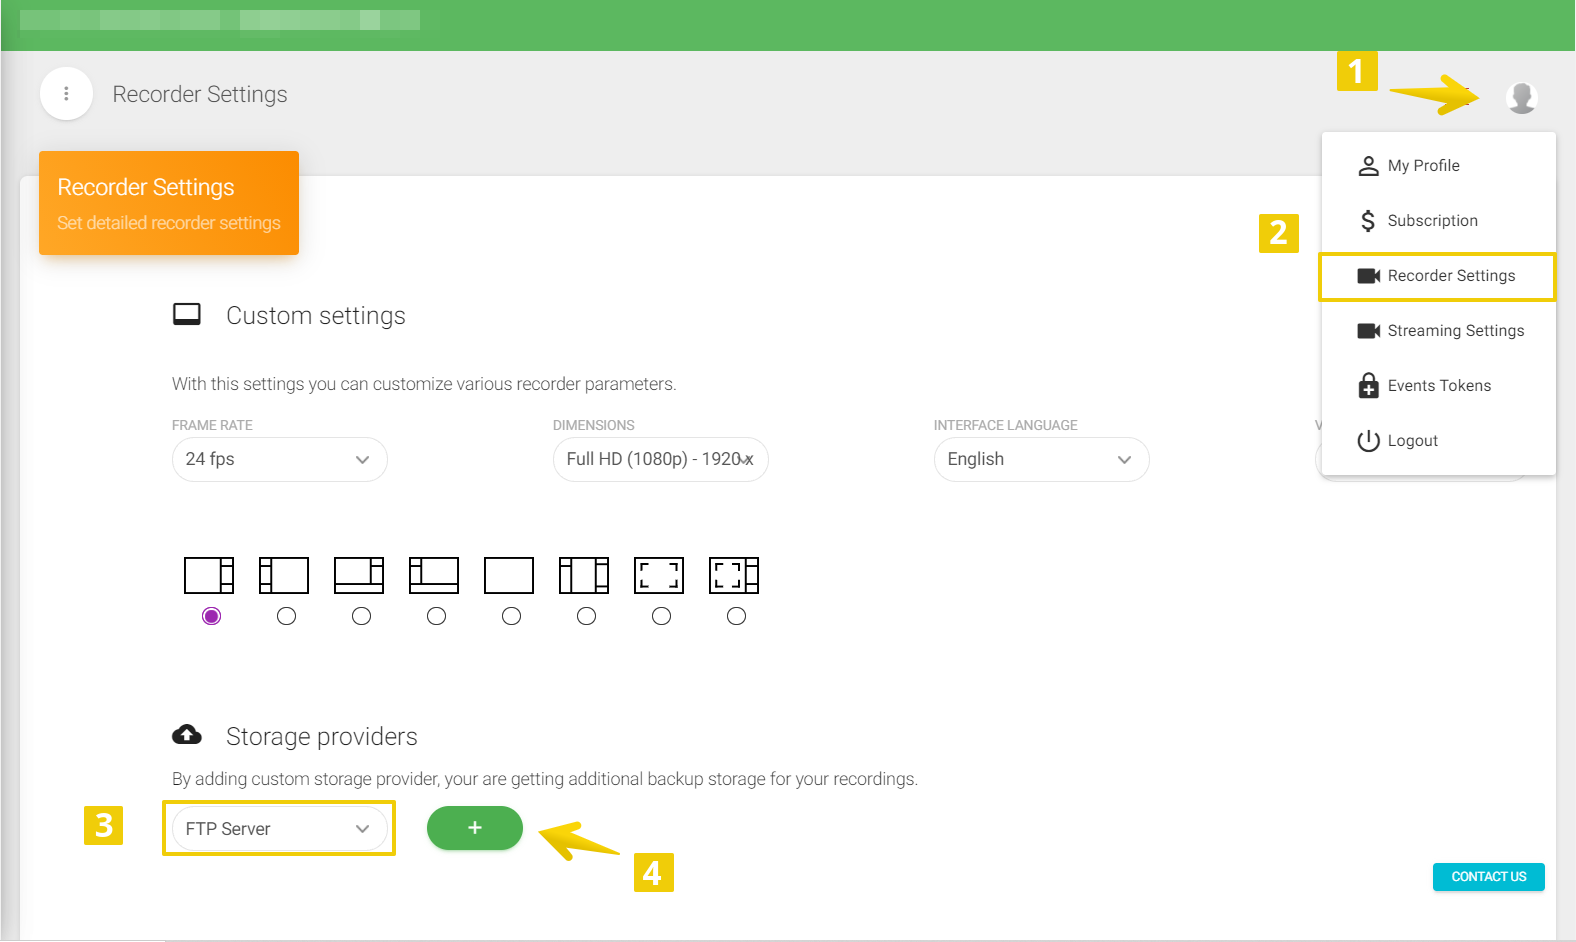
To access the expanded storage option, go to your Profile Menu (1), select “Recorder Settings” (2), and scroll to “Storage Providers”. Once there, select whether you want to access FTP or S3 storage type (3), and click the green (+) button (4).

FTP Provider
In the FTP provider section, you will be asked to provide the Hostname, Port, Username, Password, and Path data. This information should be available in your provider’s documentation, if not, you can contact their support. To remove the provider, select the red (-) button.

Here's the information you'll be asked to include:
Hostname - this is the qualified domain name of the network host or its IP address,
Port - the port number to connect to,
Username - a username on the host,
Password - the password that corresponds to the username,
Path - path specification of the form.
Once you’ve entered the necessary information, click “Verify”.
S3 Provider
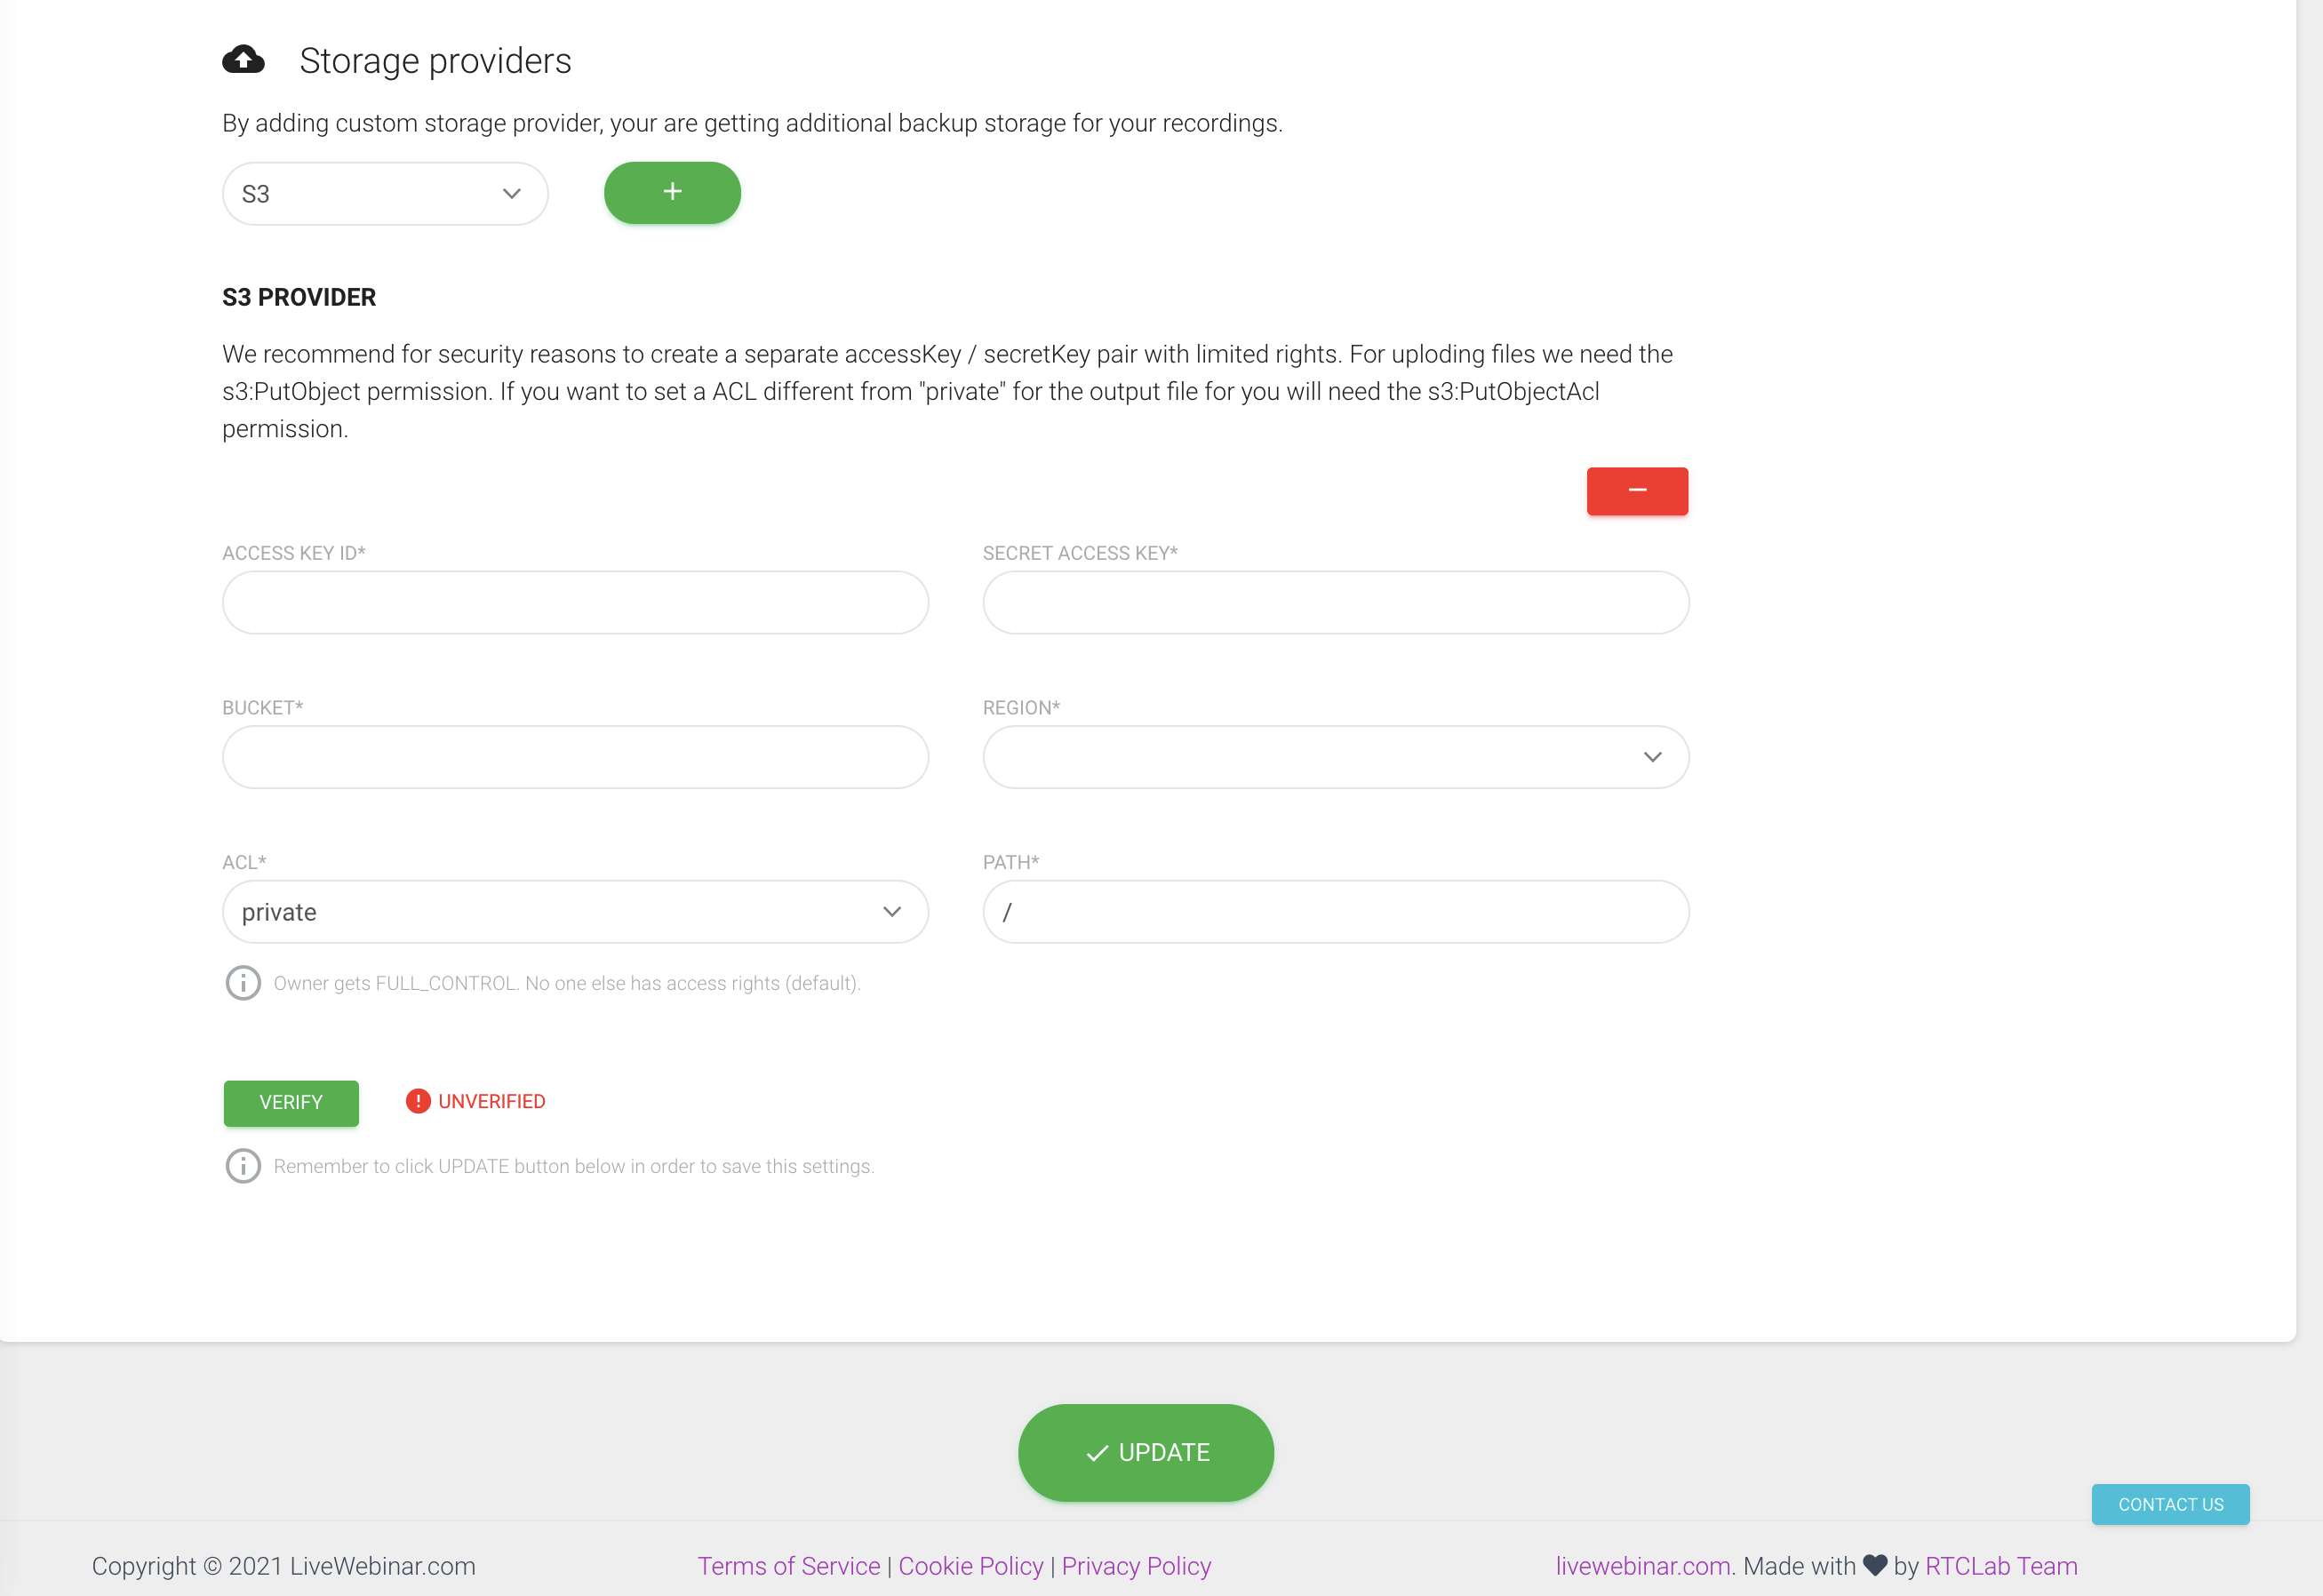
Likewise, if you’ve selected S3 as your hosting provider, you will be required to fill out fields similar to those of the FTP provider. You will be able to find this information in your provider’s documentation, or by contacting their support team. To remove the provider, select the red (-) button.

Here's the information you'll be asked to include:
Access Key ID - access key created within your S3 account,
Secret Access Key - secret access key created within your account,
Bucket - the name of the bucket you wish to send files to,
Region - region specified while creating the bucket,
ACL - access control list,
Path - path specification of the form.
Once you’ve entered the necessary information, click “Verify”.
Resources
Here you can find a list of the most often used hosting sites, along with their available resources: