CATEGORIES
- A free account
- Account assistants
- Account Information
- Affiliate Program
- Appearance
- AppSumo
- Audio & Video
- Branding / Custom / Whitelabel
- Branding Tool
- Break-out Rooms
- Call to Action
- Camera & Microphone
- Capacity & Limits
- Certificates
- Closed captioning
- Decisions - Professional Voting
- E-mail templates
- Event tokens
- Evergreen webinars
- Forms
- How to join meeting on mobiles
- Hubspot Integration
- Integrations
- Language interpretation
- Live Transcription
- Meetings & Webinars
- Other
- Pabbly Connect
- Paid Webinars
- Presence Manager
- Recording
- Registration
- Requirements
- Room Chat
- Screen Sharing
- Session Management
- Statistics & Reports
- Storage
- Streaming
- Sub-Accounts
- Tests & Surveys
- Virtual Backgrounds
- Vote Manager
- Waiting rooms
- Webinar and Meeting Room Features
- Website Presenter
- Whiteboard
- Wordpress plugin
FAQ -> Paid Webinars -> How to create a paid webinar?
How to create a paid webinar?
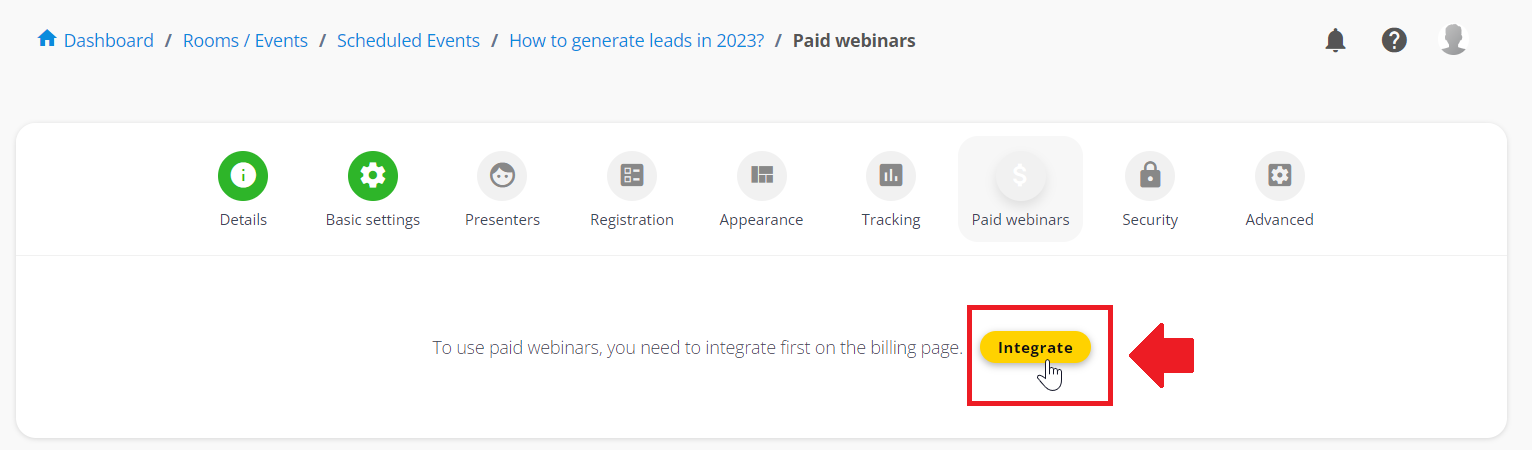
To use the Paid webinars option your account must have your billing information completed and have one of the subscription plans. AppSumo accounts can also use the Paid webinars option.
Before creating webinar tickets, you must integrate your account with one of three popular payment gateways. The choices are:
- PayPal
- Stripe
- BrainTree

Each of these options requires you to fill in your API key information. You can find information on where to look for each data in the support section of each payment gateway provider:
PayPal - https://www.paypal.com/us/cshelp/article/how-do-i-create-a-client-id-if-i%E2%80%99m-a-developer-integrating-paypal-express-checkout-for-a-merchant-ts2182
Stripe - https://stripe.com/docs/keys
BrainTree - https://developer.paypal.com/braintree/articles/control-panel/important-gateway-credentials

Note that here you can also choose the currency in which you want to sell your tickets.
After completing the necessary data and properly configuring the service, you can proceed to the stage of creating event tickets.
Note that a 10% commission will be deducted by LiveWebinar from each purchased ticket.
How to create paid webinar tickets?
To create paid webinar tickets, go to the "Paid Webinars" tab. In this view, you can choose the ticket template you have used so far or create new ones. If you create new tickets, set their price, decide if they should have a quantity limit. It is also important to determine when the platform will require payment.

Currently, two options are available:
- before entering the webinar room (in this case, registration will be possible without buying a ticket)
- during participant registration
Remember to save the changes by pressing the "Update" button.
Here you can choose the name of the ticket, specify its price and select the expiration date.
Free webinar tickets
To create free webinar tickets go to the "Security" tab. In the free tickets section, select the options to either select already created ticket templates or create new ones. The principle is analogous to the creation of paid webinar entrance tickets.


An option not to allow registration without a ticket.
When enabling paid tickets, you have the option to enforce a ticket purchase before the registration takes place. By default, it is set to OFF. However, you can set it to ON which means you do not allow registration without a ticket.
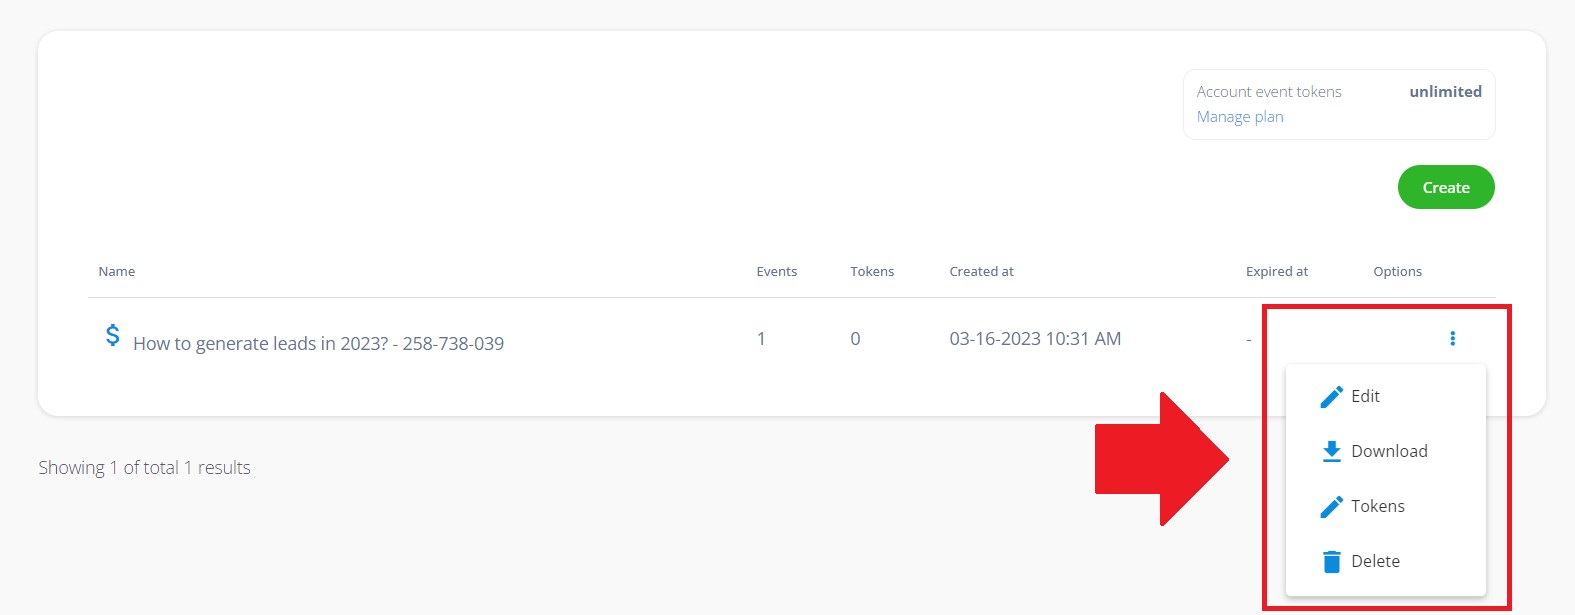
After successful configuration and creation of the token, a summary of the most important information will be displayed.
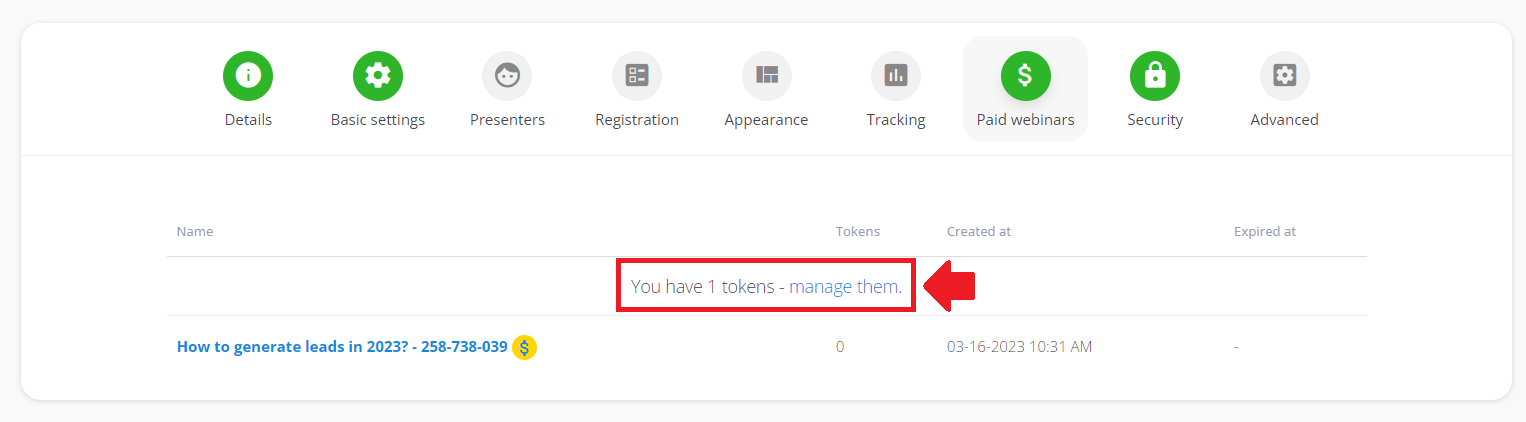
By clicking on the "manage them" button, you will have the opportunity to take a closer look at the created tokens, as well as select one of four options – edit, download, token list, delete.
Note also that the purchase form adjusts its colors to match the registration form if you use Page Templates.
Now let's look at the Paid webinars option from the attendee's point of view.
After entering the link leading to the event – a mini form will appear to the eyes of the participant asking to enter a ticket.

The green "Buy token" button allows you to start the process of buying a ticket. After clicking on it, the user will have to complete the basic data and enter the payment method. In addition, the user will be asked to read and accept the Terms of Service.


After a successful transaction, a special token will be generated and automatically entered into the form. A copy of the token will also be sent to the email address provided by the user, along with an additional confirmation of the purchase.

You can find a summary of the sale in the Billing menu.

In addition, there is a Registration >> Event Tokens tab in the main menu of the user panel, which will allow you to manage all tokens.


The income earned from your events will be sent directly to the account linked to your selected payment gateway.