CATEGORIES
- A free account
- Account assistants
- Account Information
- Affiliate Program
- Appearance
- AppSumo
- Audio & Video
- Branding / Custom / Whitelabel
- Branding Tool
- Break-out Rooms
- Call to Action
- Camera & Microphone
- Capacity & Limits
- Certificates
- Closed captioning
- Decisions - Professional Voting
- E-mail templates
- Event tokens
- Evergreen webinars
- Forms
- How to join meeting on mobiles
- Hubspot Integration
- Integrations
- Language interpretation
- Live Transcription
- Meetings & Webinars
- Other
- Pabbly Connect
- Paid Webinars
- Presence Manager
- Recording
- Registration
- Requirements
- Room Chat
- Screen Sharing
- Session Management
- Statistics & Reports
- Storage
- Streaming
- Sub-Accounts
- Tests & Surveys
- Virtual Backgrounds
- Vote Manager
- Waiting rooms
- Webinar and Meeting Room Features
- Website Presenter
- Whiteboard
- Wordpress plugin
FAQ -> Live Transcription -> How to use the Live transcription feature during a webinar?
How to use the Live transcription feature during a webinar?
What is Live transcription (Closed Captioning) feature in LiveWebinar?
Live transcription is a feature that allows you to generate subtitles from what participants say during meetings, webinars and online events. This makes it easier to access content for the hearing impaired and those who cannot listen to the audio at the time, and helps to create international events with ease.
What factors affect the quality of subtitles generated?
Factors that affect the quality of subtitles include background sounds, quiet or unclear speech, accents and dialects; speaking too fast, and the wrong language selected in the transcription settings.
How to use the Live transcription feature during a webinar?
Step 1: Before you start using the Live transcription option – make sure you are using the latest version of Windows or macOS. Open the latest version of Google Chrome or Microsoft Edge browser.
Step 2: Enable live transcription
Log in to your LiveWebinar account.
Start your meeting, webinar or event and click on the Closed Captioning icon in the menu located in the navigation bar.

Alternatively, you can use the sharing menu or the audio and video module menu for this purpose.
When the Closed Captioning options configuration window appears, enable Automatic voice transcription
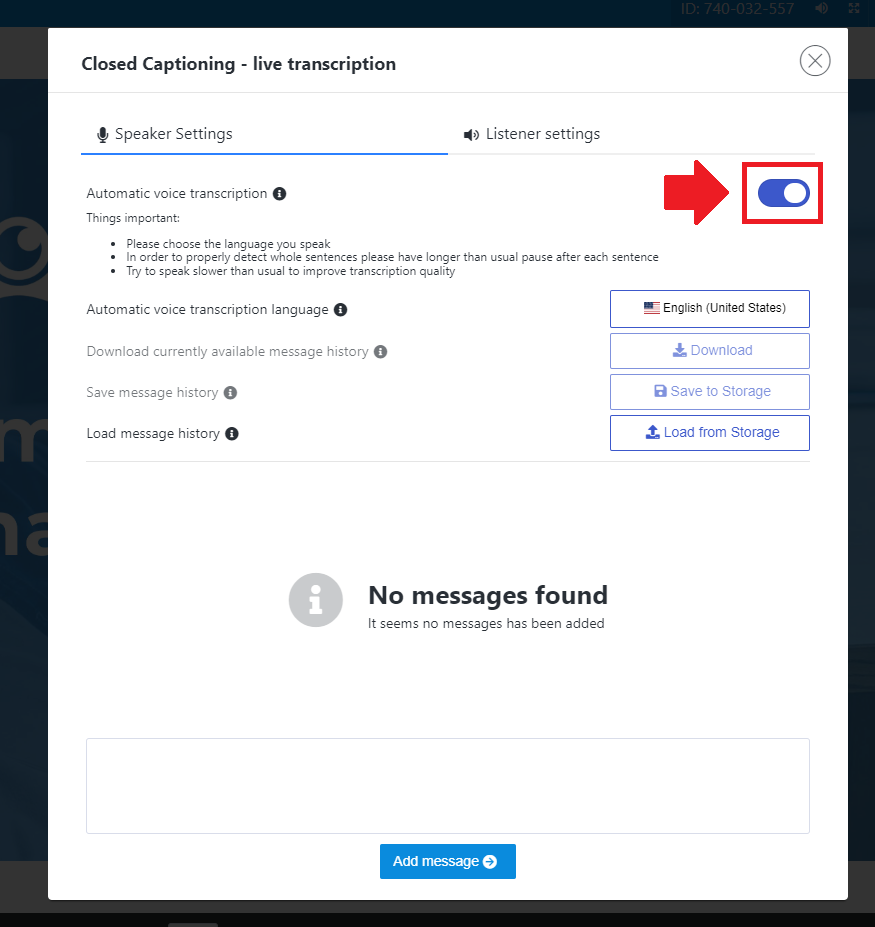
Step 3: Adjust the transcription settings
In the Closed Captioning options configuration window, you have the option to select the language of the speaker, download the message history, save the message history and load the message history.
Make sure that the language selected in the settings corresponds to the language of the speaker at the event.
In the Listener settings tab, each participant can adjust the font size and text contrast according to their preferences.
Step 4: Manage the visibility of the live transcript
Each attendee can decide whether they want to see their transcribed text box.
When you click on the displayed text, you can change the position of the text in one of two options – transcriptions displayed at the top or bottom of the screen.

Step 5: Export transcription history (optional)
During the event, the presenter can export the transcription history to a file.
Note that exporting the history becomes impossible after leaving the room, and the transcription history does not save in the Account Panel or becomes available for download after the event.
Step 7: Disable live transcription
To disable live transcription, click on the Encoded Subtitles icon in the menu located in the navigation bar (or alternatively: in the sharing menu or the Audio and Video module).