CATEGORIES
- A free account
- Account assistants
- Account Information
- Affiliate Program
- Appearance
- AppSumo
- Audio & Video
- Branding / Custom / Whitelabel
- Branding Tool
- Break-out Rooms
- Call to Action
- Camera & Microphone
- Capacity & Limits
- Certificates
- Closed captioning
- Decisions - Professional Voting
- E-mail templates
- Event tokens
- Evergreen webinars
- Forms
- How to join meeting on mobiles
- Hubspot Integration
- Integrations
- Language interpretation
- Live Transcription
- Meetings & Webinars
- Other
- Pabbly Connect
- Paid Webinars
- Presence Manager
- Recording
- Registration
- Requirements
- Room Chat
- Screen Sharing
- Session Management
- Statistics & Reports
- Storage
- Streaming
- Sub-Accounts
- Tests & Surveys
- Virtual Backgrounds
- Vote Manager
- Waiting rooms
- Webinar and Meeting Room Features
- Website Presenter
- Whiteboard
- Wordpress plugin
FAQ -> Integrations -> How to properly connect a tracking pixel to LiveWebinar?
How to properly connect a tracking pixel to LiveWebinar?
The LiveWebinar platform allows webinar participants to be tracked using so-called tracking pixels. Currently, it is possible to use:
- Google Tag Manager
- Google Analytics (including GA4)
- Facebook Pixel
- LinkedIn Pixel
- Segment Pixel
- Custom pixel
Below are step-by-step instructions on how to use the tracking pixel option.
1. In the event creation panel, go to the Tracking tab
![]()
2. Here you can paste the appropriate keys and identifiers to properly configure the service. ![]()
Google Tag Manager - For Google Tag Manager, paste the Container ID (in GTM-XXYYZZZ format). You can find it, among other things, in the Google Tag Manager main panel, which will be displayed right after logging into the service.
![]()
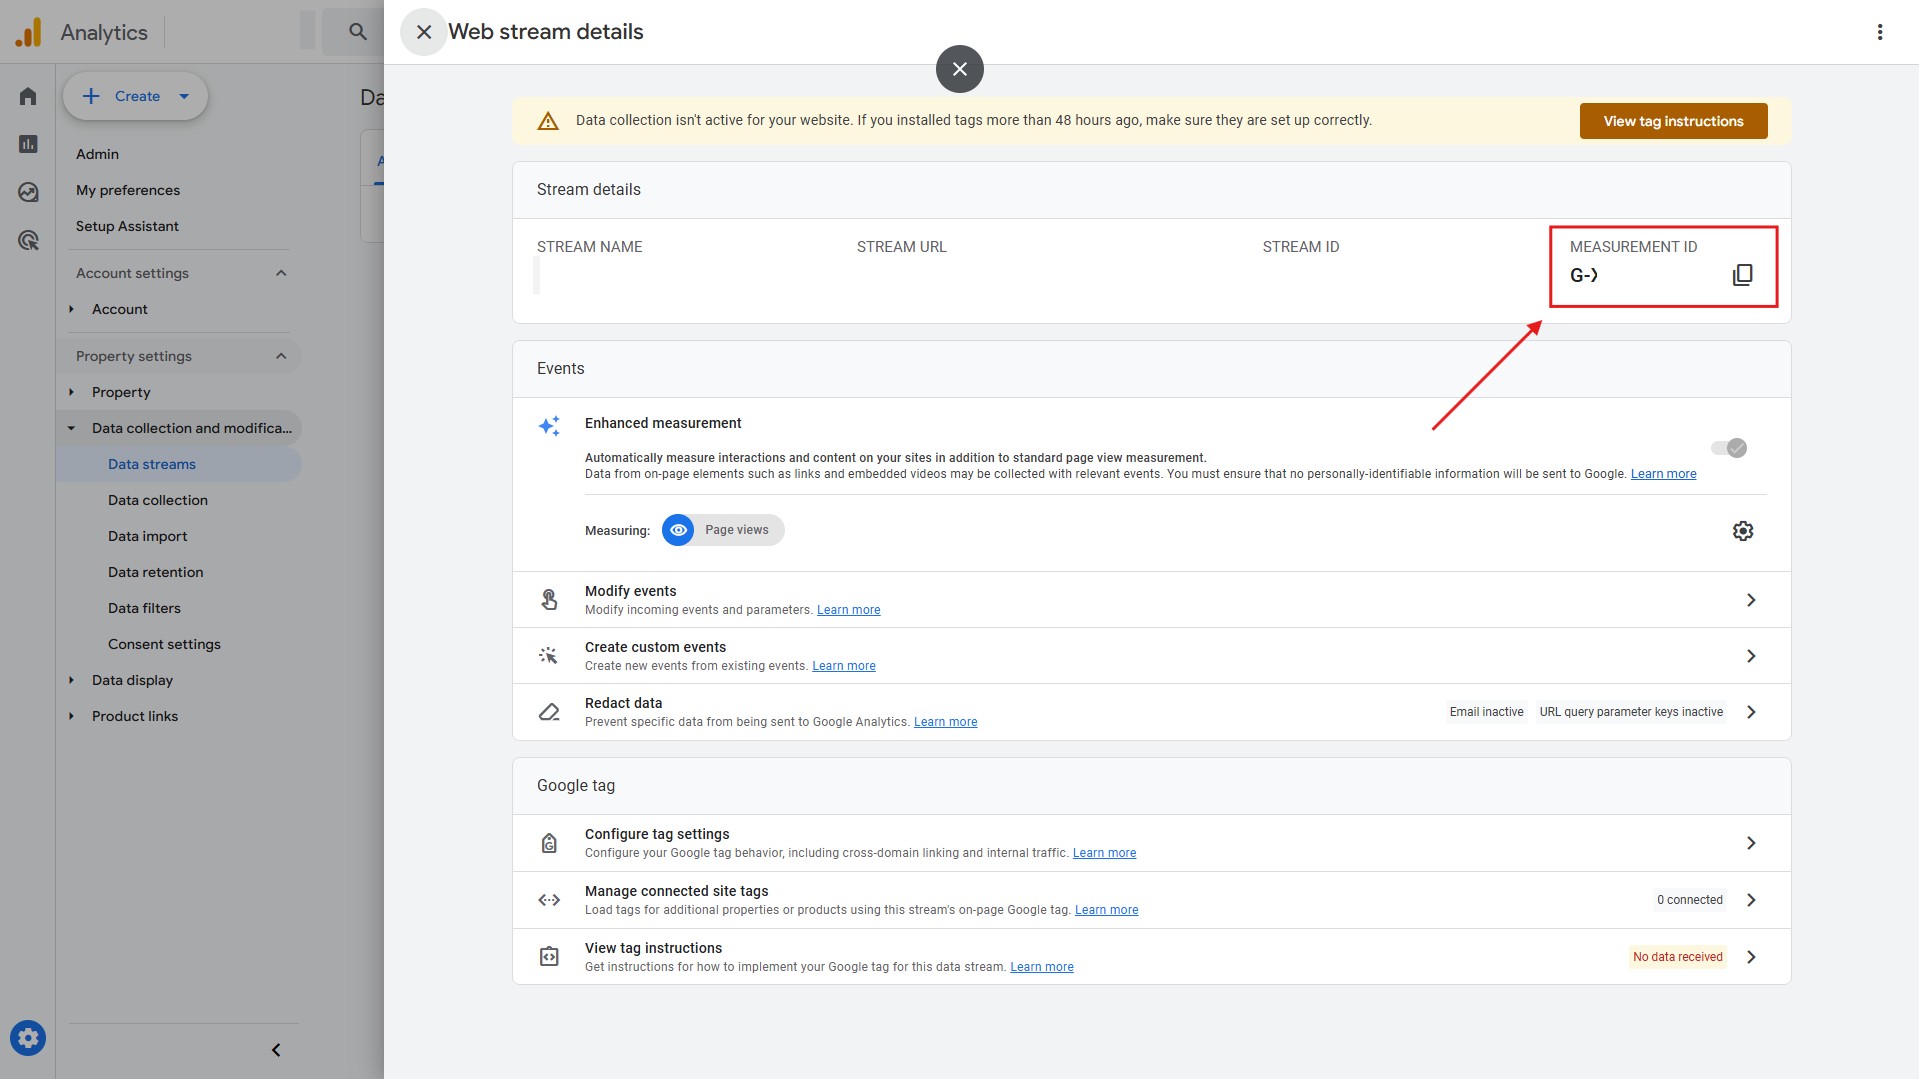
Google Analytics 4 - copy and paste the Measurement ID, which you will find in the admin panel.
Facebook Pixel - copy and paste the Pixel ID from the Events Manager tab in your account
![]()
Pixel segment - you can find more information here.
LinkedIn Pixel
In the Tracking tab field, paste the LinkedIn Partner ID, which you can find in the Insight tag code.
To obtain it, select the manual installation option for the tag. Then, copy the code and find the “linkedin_partner_id” parameter. It should look like this: _linkedin_partner_id = "XXXXXXX"; (where XXXXXXX will be a series of 7 digits representing your LinkedIn Partner ID).
Copy these digits and paste them into the appropriate field on the LiveWebinar platform.
Next, create an Insight Tag conversion and configure it manually. For the conversion tracking method, select “page load” and set the “Match URL” field to addresses that start with app.livewebinar.com. Save the configuration.
The setup should work immediately, but its verification status may refresh after a few hours.
If you have any questions or issues, please contact our support team at [email protected]