CATEGORIES
- A free account
- Account assistants
- Account Information
- Affiliate Program
- Appearance
- AppSumo
- Audio & Video
- Branding / Custom / Whitelabel
- Branding Tool
- Break-out Rooms
- Call to Action
- Camera & Microphone
- Capacity & Limits
- Certificates
- Closed captioning
- Decisions - Professional Voting
- E-mail templates
- Event tokens
- Evergreen webinars
- Forms
- How to join meeting on mobiles
- Hubspot Integration
- Integrations
- Language interpretation
- Live Transcription
- Meetings & Webinars
- Other
- Pabbly Connect
- Paid Webinars
- Presence Manager
- Recording
- Registration
- Requirements
- Room Chat
- Screen Sharing
- Session Management
- Statistics & Reports
- Storage
- Streaming
- Sub-Accounts
- Tests & Surveys
- Virtual Backgrounds
- Vote Manager
- Waiting rooms
- Webinar and Meeting Room Features
- Website Presenter
- Whiteboard
- Wordpress plugin
FAQ -> Evergreen webinars -> What is an Evergreen webinar and how to schedule it?
What is an Evergreen webinar and how to schedule it?
What are Evergreen webinars?
Evergreen webinars are automated events that may run countless times. With automated webinars you record the material only once, with no need of refreshing the content or adjusting it to your audience. Simply select the recording that you want to repeat over time and assign it to your event.
How do I schedule an Evergreen webinar?
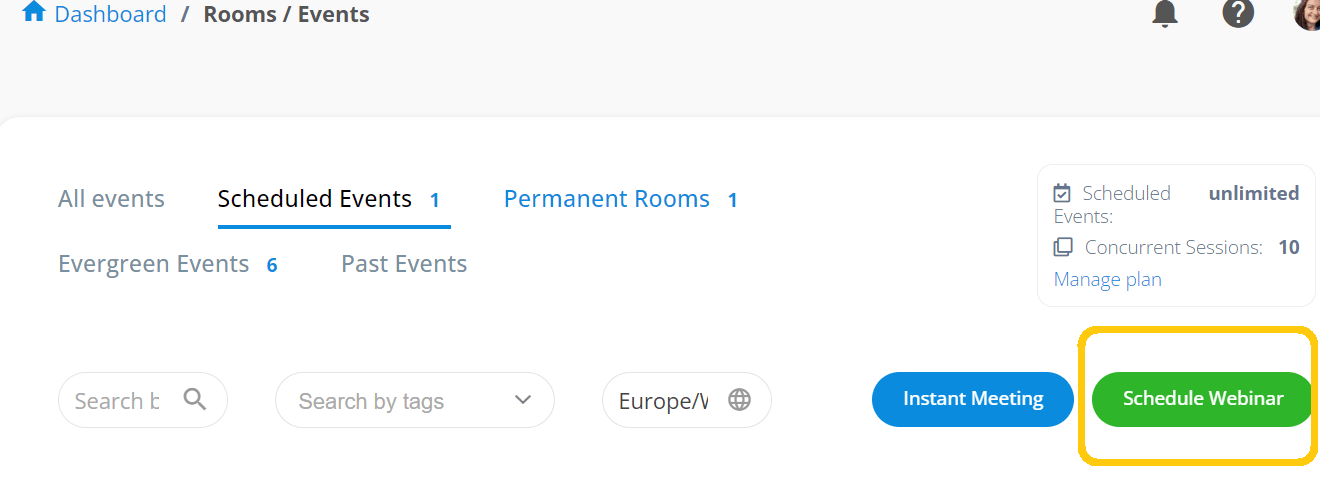
- In your account choose Rooms/Events option in the left sidebar.
- Click the “Schedule Webinar” button
3. Choose the option "Evergreen".

4. Name your webinar (example: “Evergreen-12”) and select “Evergreen room – automatic event”.
5. Set up your Evergreen webinar scheduling.
Choose a starting date for your webinar and decide how many times you want to replay it. Open the dropdown menu in the Select recording field and choose a recording for your Evergreen webinar.
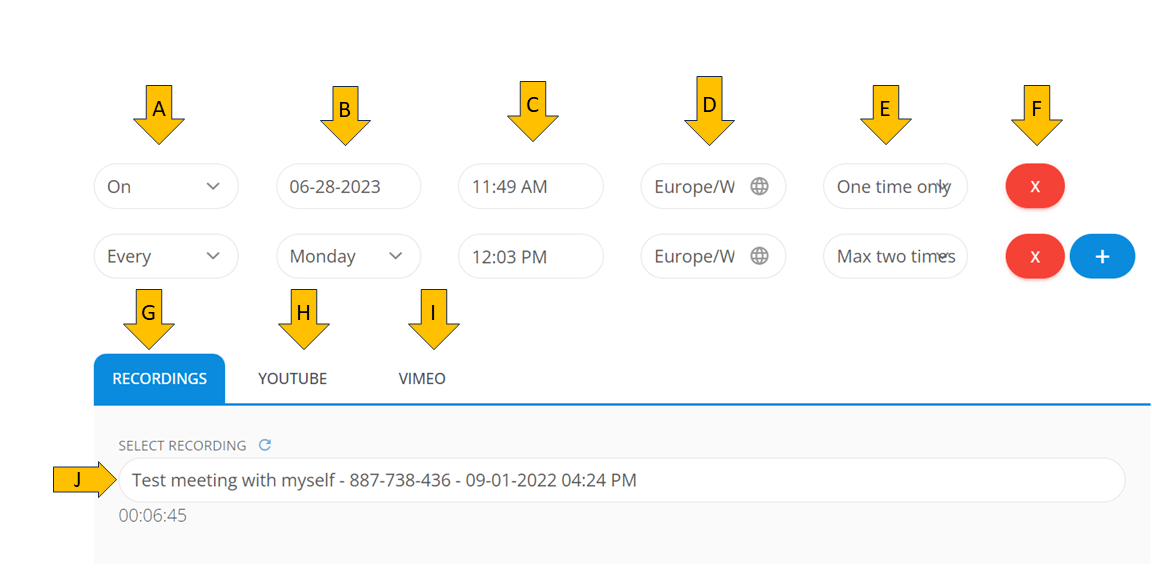
A, B – Select if your webinar should be one-time event or a repetitive one. You can decide whether you want your webinar to take place on a specific date or if you want to run it i.e every Monday for three weeks in a row (choose frequency from point E)
C – Set up time for your Evergreen event
D – Here you can select a time zone for your event scheduling
E – Choose the frequency of your Evergreen webinar. Decide whether you want it to take place two/three/four/five times (weeks) in a row. You can also choose “Infinitive” if you want your webinar to take place every week.
F – Add more scheduling/delete scheduling
G – If you click on this button, you will be able to select a recording for your Evergreen webinar, and the list of your LiveWebinar recordings will appear down below.
(Please keep in mind that the final recording depends on the layout you’ve chosen before hitting the REC button. For a better overall look, it’s recommended to select the type of recordings that are mentioned in the DESCRIPTION)
H – Click this button if you want to point your own recording hosted on YouTube. Down below you have to paste the YouTube link. The status of the selected video clip should be public.
I – Click this button if you want to point your own recording hosted on Vimeo. If you click this down below you will need to paste the URL of the recording. The status of the selected video clip should be public.
J – Provide YouTube/Vimeo link here or choose a recording for your Evergreen Webinar.
6. Select Call to Action and fill in the event agenda (optional).
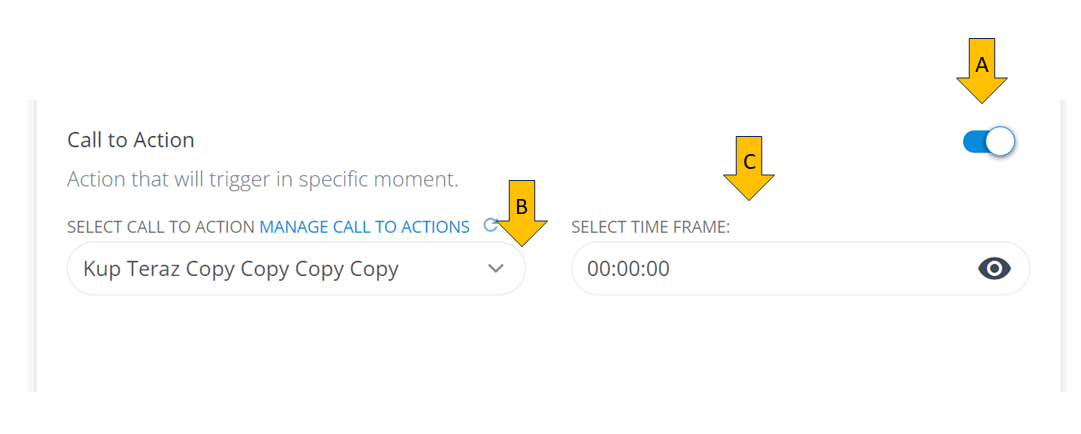
A – Turn on/off the Call to Action
B – Select the previously created Call to Action or click Manage Call to Actions to create a new one.
C – Set when exactly the Call to Action has to show up (see instructions in the next point).
7. Decide when the Call to Action will pop up by clicking on “Select Time Frame” field.
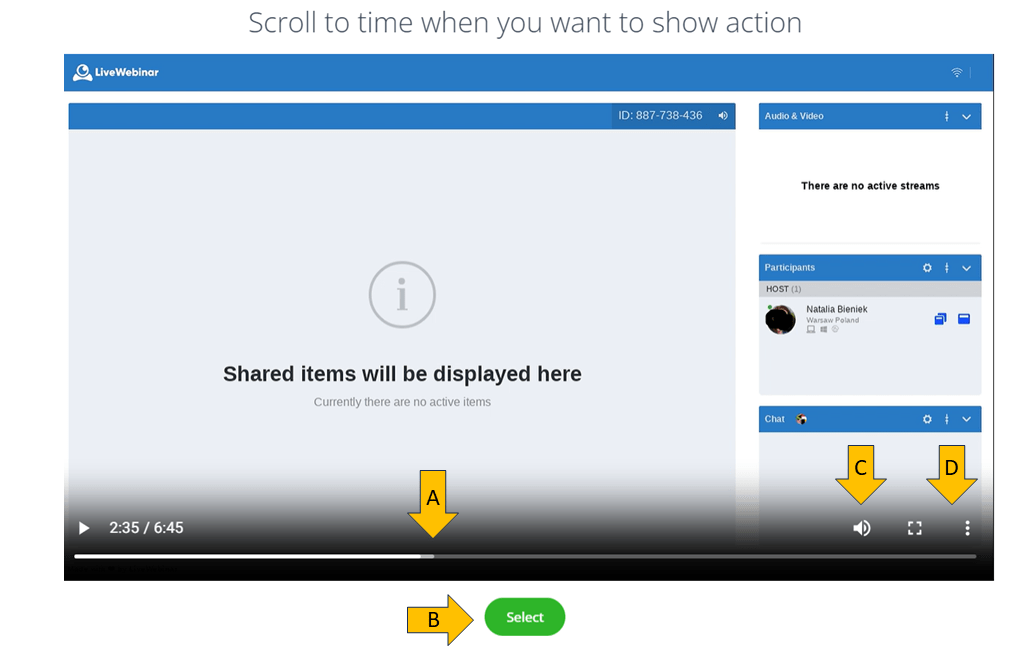
A – Select time when the Call to Action has to pop up
B – Click this button if you choose when the CTA will show up
C – Preview settings: Adjust the volume and turn on/off Fullscreen (These options regard only the preview and don’t affect the volume or layout of the evergreen)
D – Click here to download the recording
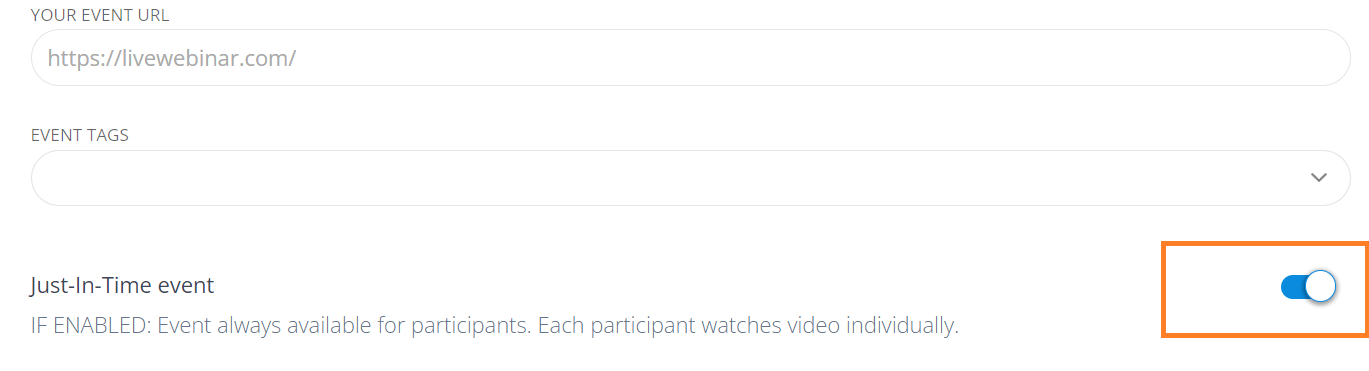
8. Just-In-Time event
Toggle the Just-In-Time option if you want attendees to join your event anytime. The recording you’ve chosen in the previous steps will be displayed individually for each of them.
9. You can also use the Chat option.
Watch the video tutorial to see how to enable this feature.
10. Countdown clock
You can also set up Countdown clock for your Evergreen webinar. To do so, go to Advanced options in the upper menu of the Evergreen event you want to organize.

Toggle this option to enable Countdown clock inside the waiting room. Each attendee will see how much time is left until the start of your event.
11. Go to “Security” tab
In the “Room protections” you can enable or disable a Waiting Room for your Evergreen.