CATEGORIES
- A free account
- Account assistants
- Account Information
- Affiliate Program
- Appearance
- AppSumo
- Audio & Video
- Branding / Custom / Whitelabel
- Branding Tool
- Break-out Rooms
- Call to Action
- Camera & Microphone
- Capacity & Limits
- Certificates
- Closed captioning
- Decisions - Professional Voting
- E-mail templates
- Event tokens
- Evergreen webinars
- Forms
- How to join meeting on mobiles
- Hubspot Integration
- Integrations
- Language interpretation
- Live Transcription
- Meetings & Webinars
- Other
- Pabbly Connect
- Paid Webinars
- Presence Manager
- Recording
- Registration
- Requirements
- Room Chat
- Screen Sharing
- Session Management
- Statistics & Reports
- Storage
- Streaming
- Sub-Accounts
- Tests & Surveys
- Virtual Backgrounds
- Vote Manager
- Waiting rooms
- Webinar and Meeting Room Features
- Website Presenter
- Whiteboard
- Wordpress plugin
FAQ -> Event tokens -> How to attach tickets my webinar?
How to attach tickets my webinar?
Setting up the event and assigning the tickets
1. Setting up the event
Once you’re logged into your LiveWebinar account, click through to the Rooms / Events tab.
Then, use the “Schedule webinar” button for a new event. Give your webinar a name and schedule it at a preferred time.
You can also click on the three dots on the right hand side to modify the existing event. Next, click on the “Edit” button with a cogwheel next to it.
2. Enabling free tickets
Once you’re on the “Basic settings” dashboard, click over to “Security”.
You should then be able to see the “Free tickets” submenu.
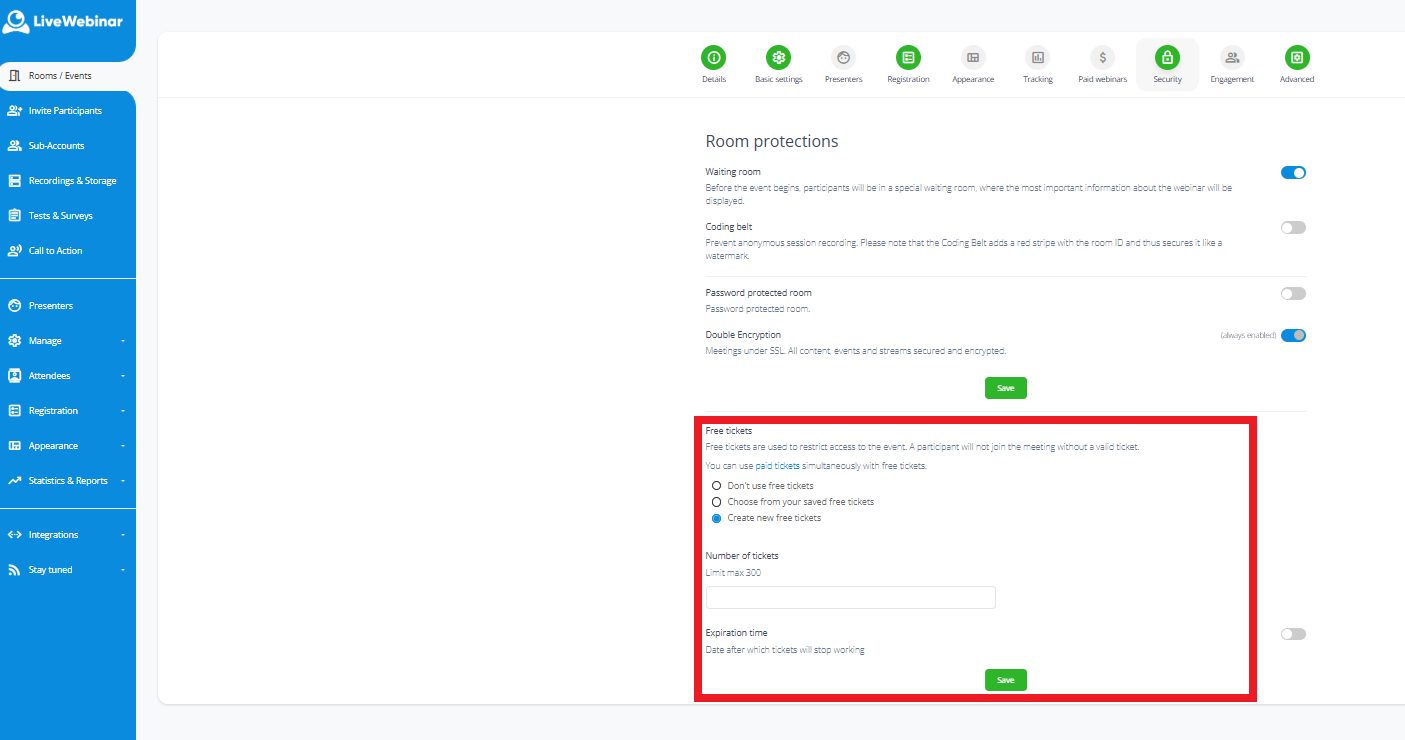
There are three options you can customise:
- Number of tickets - Total ticket number is capped at a maximum of 300 separate codes.
- Expiration time - If you want to constrain the time window in which the attendee may use their ticket. You can turn this option on, and off.
Once you have selected your preferred settings, click “Save” to proceed.
3. Managing the tickets
You should now see a different layout. “Free tickets” is now replaced with a Ticket management dashboard.
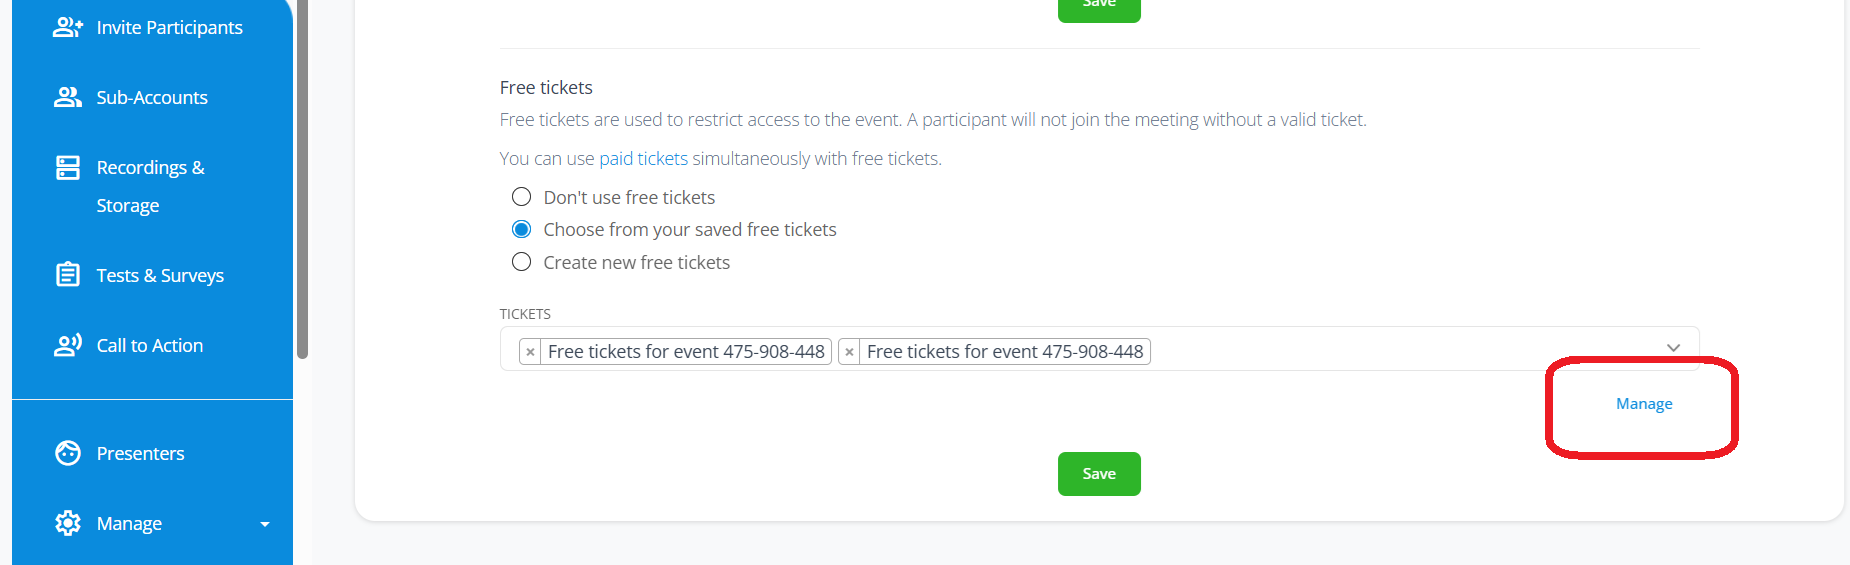
In order to manage tickets, make sure to click the “Manage” link highlighted in blue.
This will redirect you to the “Event tickets” submenu in the “Registration” tab.
Here you can see all your tokens in one place.
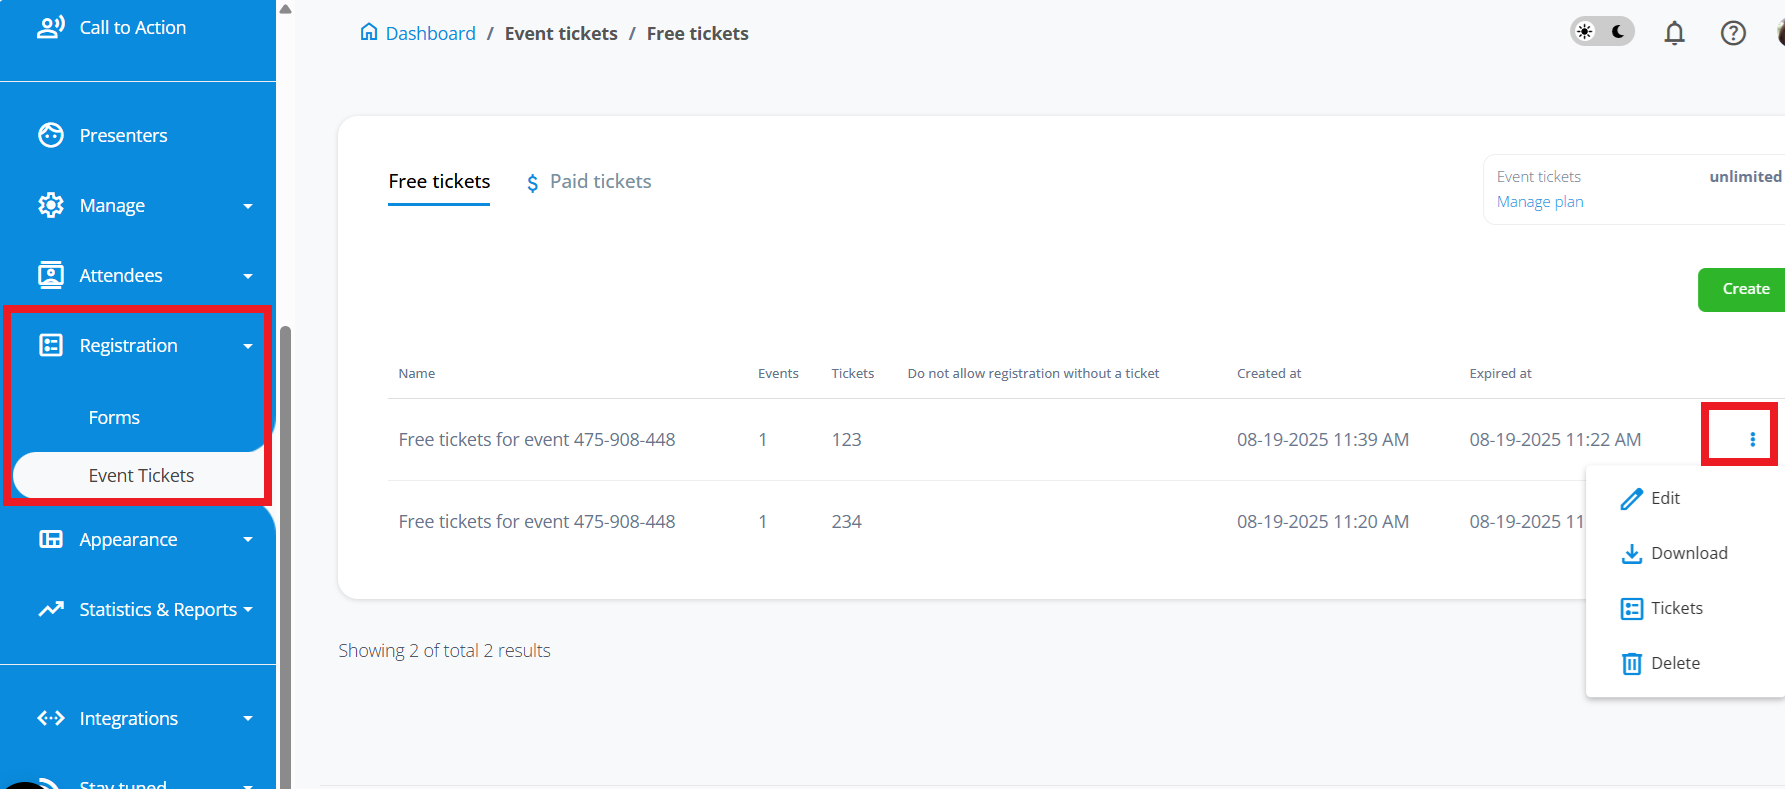
To edit them, click on the three dots on the right hand side.
For future reference - you can always access the ticket data under this submenu.
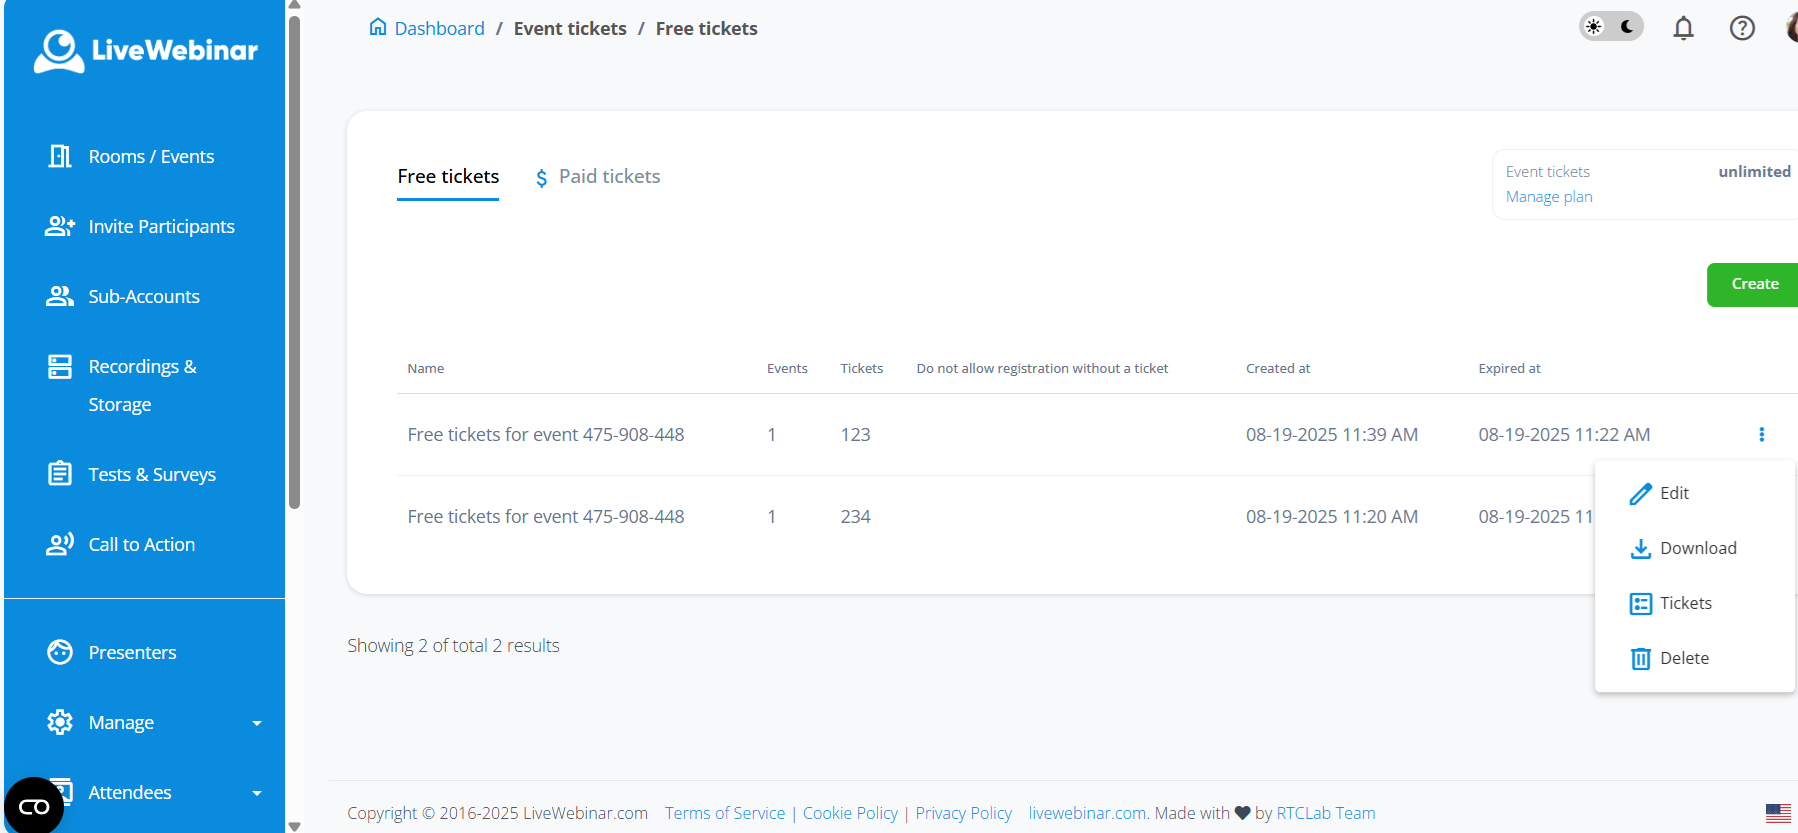
There are four options for you to select:
3.1. Edit - Add a name and expiration time to your tickets.
Here, you can also assign them to a particular event.
3.2. Download - Export all of your ticket codes into a .csv file
3.3. Tickets - Look up your tickets, check their creation date, expire or delete them
3.4 Delete - A straightforward way of deleting an entire batch of tickets.
Remember, if you need any further help or guidance, our Customer Support can be found here!